Implementing text chat using UI Kit
try a more advanced tutorial!
The procedure is the same as the general tutorial until the middle of the tutorial.
Prepare resources for login process
First, create a ScriptableObject that defines the environment information.

Open the context menu in Project and create Create > Game Server Services > Core > Environment.
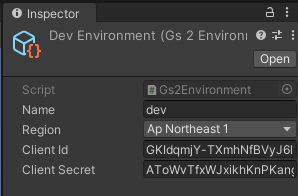
Create the ScriptableObject you created with create credential (API key) to the ScriptableObject you created. Enter the environment name in the Name field.
Next, create a GameObject to hold the GS2 client.
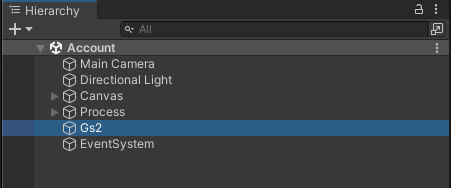
Create an appropriate GameObject in the scene. In this case, we have prepared a GameObject named “GS2.
Specify the Environment created earlier in Environments and specify the environment name in Active Environment to determine the currently active environment.
Although this configuration is made possible to facilitate environment switching, it is recommended that ScriptableObjects such as development environments not be included in the build artifact at the time of product release.
OnError can be set to an event handler that is fired if initialization fails. GS2ClientHolder provides a DebugErrorHandler function to dump error messages. In this case, we only need to know that an error has occurred, so we will use this event handler.
With this simple setup, the SDK will be initialized on its own when the game starts.
As you have created the environment, you need to declare the resources available in GS2 as ScriptableObjects.
In this case prepare the resources needed for the login process, create the namespace “game-0001” in GS2-Account, and create the namespace “account” in GS2-Key. GS2-Key created a namespace named “account-encryption-key-namespace” and an encryption key named “account-encryption-key”, so we need to reflect those settings.
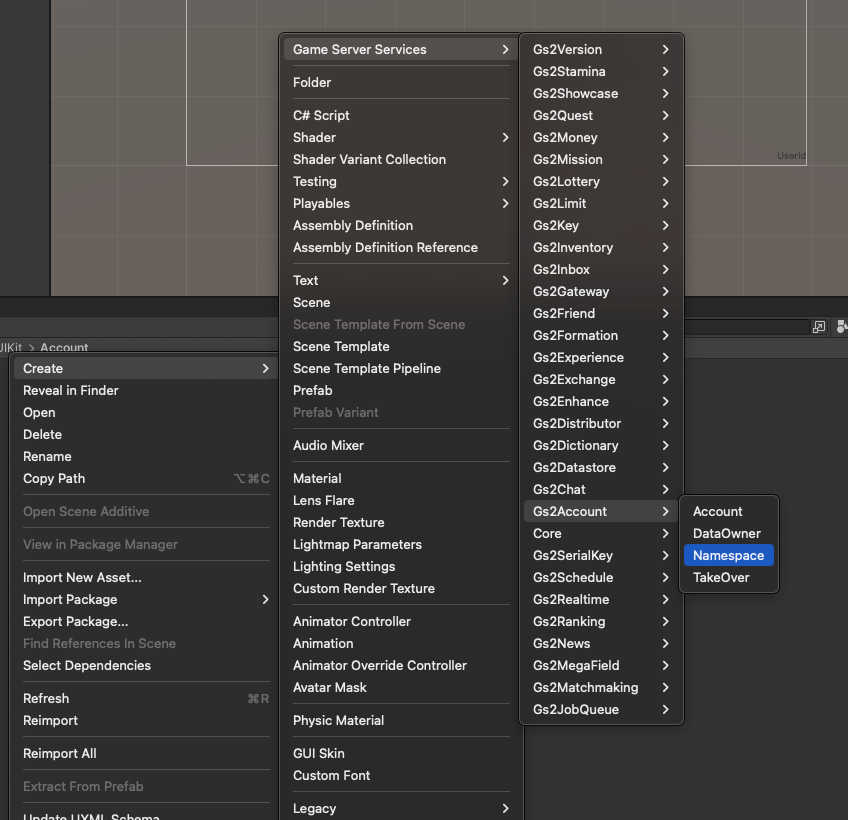
As before, create a ScriptableObject by Create > Game Server Services > Account > Namespace from the Project context menu.

Enter the name of the namespace in the ScriptableObject you created.
Create a ScriptableObject for GS2-Key in the same way.


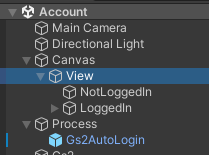
Although this is called implementation, there is a Prefab that can be placed in the scene to perform the “create account and login” process.
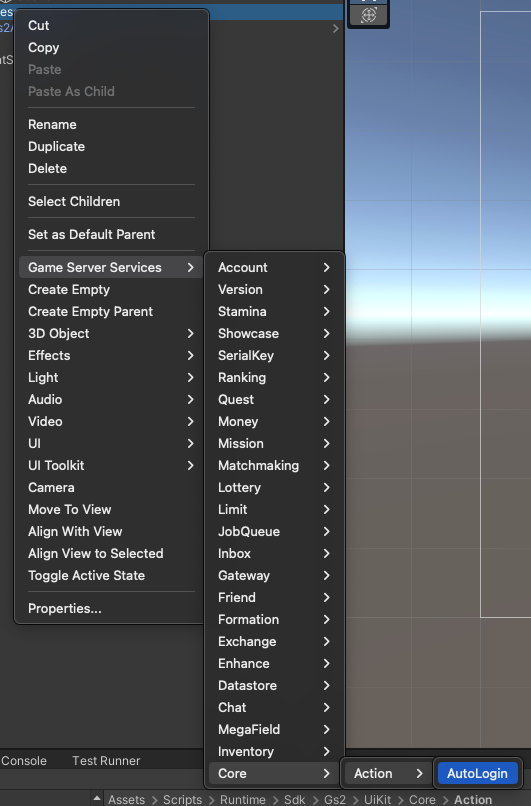
With the appropriate GameObject selected in the Hierarchy, open the context menu and select Game Server Services > Core > Action > AutoLogin.
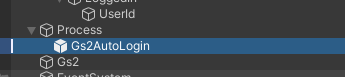
A prefab object called Gs2AutoLogin will then be added under the selected node.
Specify the ScriptableObject of the GS2-Account namespace in Namespace and the ScriptableObject of the GS2-Key encryption key in Key.
OnAutoLoginComplete and OnError are provided as event handlers.
OnAutoLoginComplete is called on success, and the process of deactivating its own GameObject is executed. OnError is called on failure, and the GS2ClientHolder’s DebugErrorHandler is called.
This is where UIKit really comes into its own. Let’s display the login status on the screen.

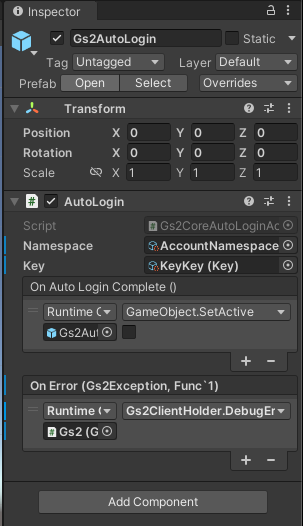
We prepare a hierarchy called View under Canvas and place the text NotLoggedIn / LoggedIn under it.
As you can see, the two texts are superimposed in the center of the screen.
We will now switch the text to be displayed according to the login status.
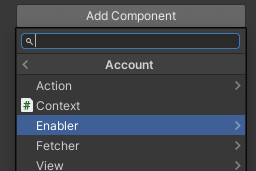
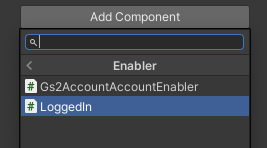
The UI Kit has a component called “Enabler” that enables or disables a specific node according to its state.
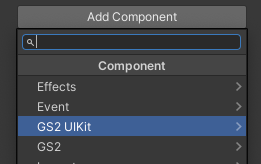
Select the View node and add the component.
 !
!
You can set display conditions and control targets for the component.
When Logged In is unchecked = not logged in, the controlled object will be displayed.
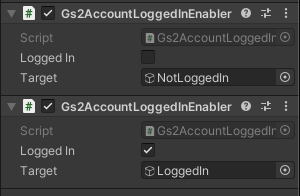
Register two components and set which node you want to activate in logged in and un-logged in state respectively.
Let’s execute it.

You will see the above for a moment, and then it will immediately switch to the following display.

In other words, the AutoLogin prefab performs the login process, resulting in the login status changing and the UI display switching on its own.
Now let’s use Context, Fetcher and Label.
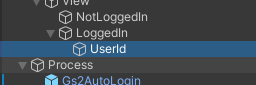
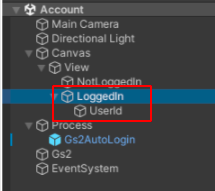
First, we prepare the UI by creating a text node named UserId under LoggedIn. Let’s make this text reflect the user ID of the currently logged in player.

Select the LoggedIn node.
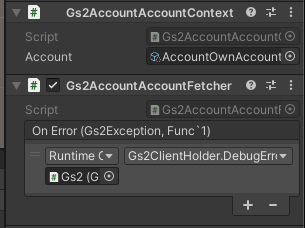
Add the Gs2AccountAccountContext and Gs2AccountAccountFetcher components.
Set the account information you want to display in Gs2AccountAccountContext.
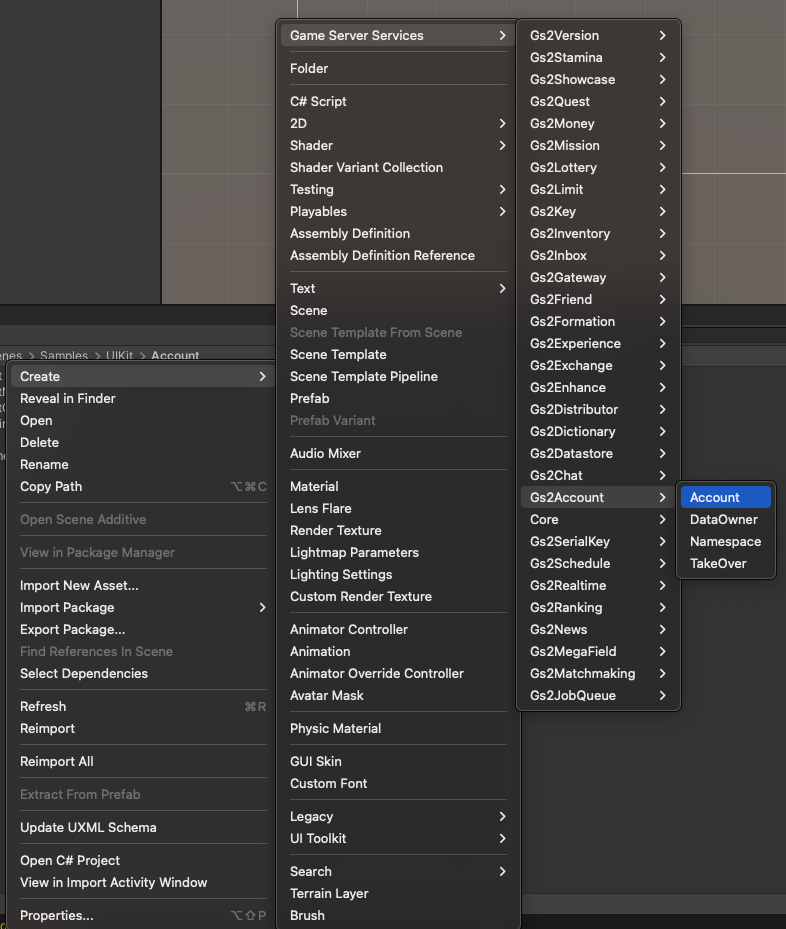
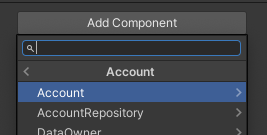
Create a ScriptableObject for the Account.
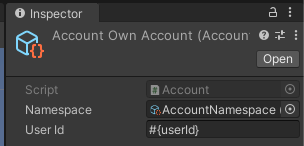
Specify #{userId} for the user ID to treat it as your own user ID.
By specifying this ScriptableObject in the Gs2AccountAccountContext, any Account-related operations under the LoggedIn node using UIKit will be handled as operations on the object specified in the Context.
Gs2AccountAccountFetcher is placed next to Gs2AccountContext. This allows Gs2AccountAccountFetcher to retrieve and maintain information about the logged-in user from the server.
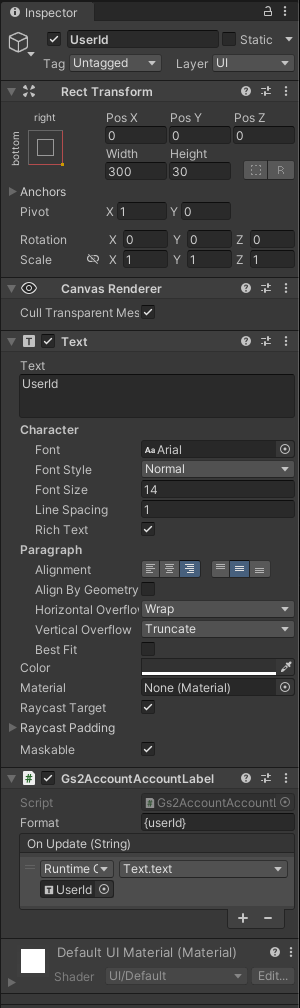
Next, add a Gs2AccountAccountLabel to the UserId node. Specify the formatting method of the string to be reflected in the text in Format.
In this case, we are creating a text that reflects the userId field from the account information obtained by Fetcher.
The formatted text is passed to OnUpdate, which reflects it in the text component.
Let’s run it again.
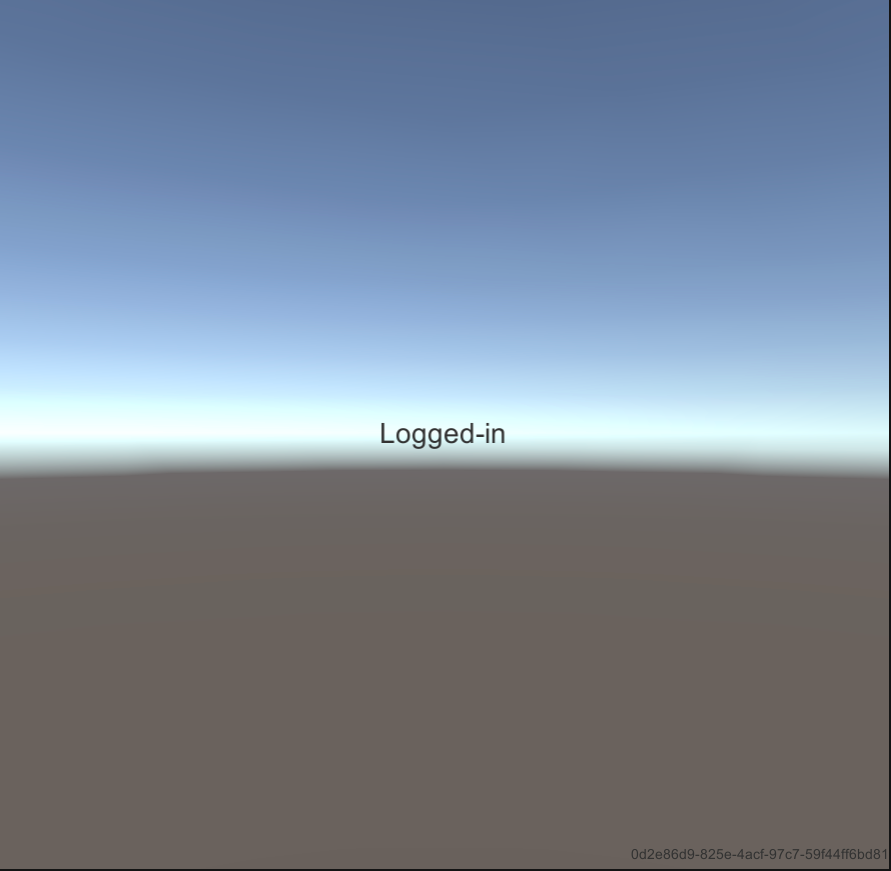
When the login is complete, the user ID is now displayed in the lower right corner.
Programming in which the code is processed from top to bottom is called Procedural programming.
On the other hand, programming like UI Kit is called Declarative Programming.
If you find this strange, you have probably been doing mainly Procedural programming.
If you are familiar with Procedural programming, you may feel that it is difficult to follow how the side effects of processing occur, and that it is hard to use.
On the other hand, the advantage of Declarative programming is that you don’t have to think about side effects, and you can finally define how you want each GameObject to behave, so that the order of processing and who executes it are out of your awareness.
Once you understand the difference between Procedural programming and Declarative programming, you will be able to use
If you understand the difference between Procedural programming and Declarative programming, you will understand that a description style that declares how you want the UI to behave depending on the state, such as the UI Kit, is a good match for Unity.
try a more advanced tutorial!
try a more advanced tutorial!
Introduction of GS2 UIKit for Unity implementation samples