GS2-Deploy
Adding users and credentials (authentication information) can be done from the GS2-Identifier administration screen, but it is easier with GS2-Deploy.
GS2-Deploy is a service designed to realize continuous delivery. It allows automatic construction of resources using code written in YAML format.
For example, if you create a stack using a template for adding a new user, you can automatically add a new user to GS2-Identifier.
About Stacks GS2-Deploy actually operates resources of each service based on a template (which describes how to operate and build resources in GS2). A stack is a collection of resources built using this template.
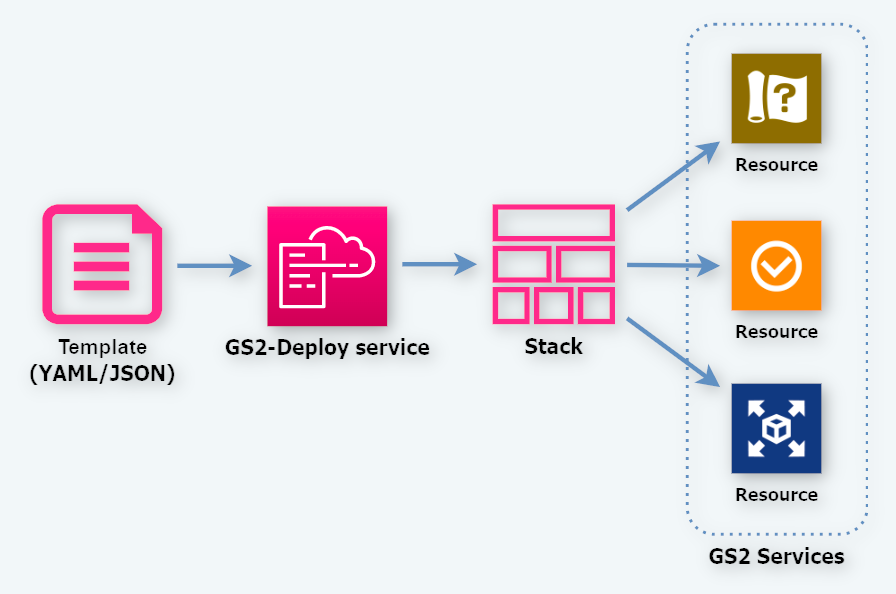
When a template with changed contents is reapplied to the stack, the update process is executed. The system detects differences in changes and automatically creates new resources that need to be created, updates resources that need to be updated, and deletes resources that need to be deleted. This mechanism eliminates the need for the developer to delete resources that are no longer needed, and allows for automatic creation simply by describing the desired resource status in a template.
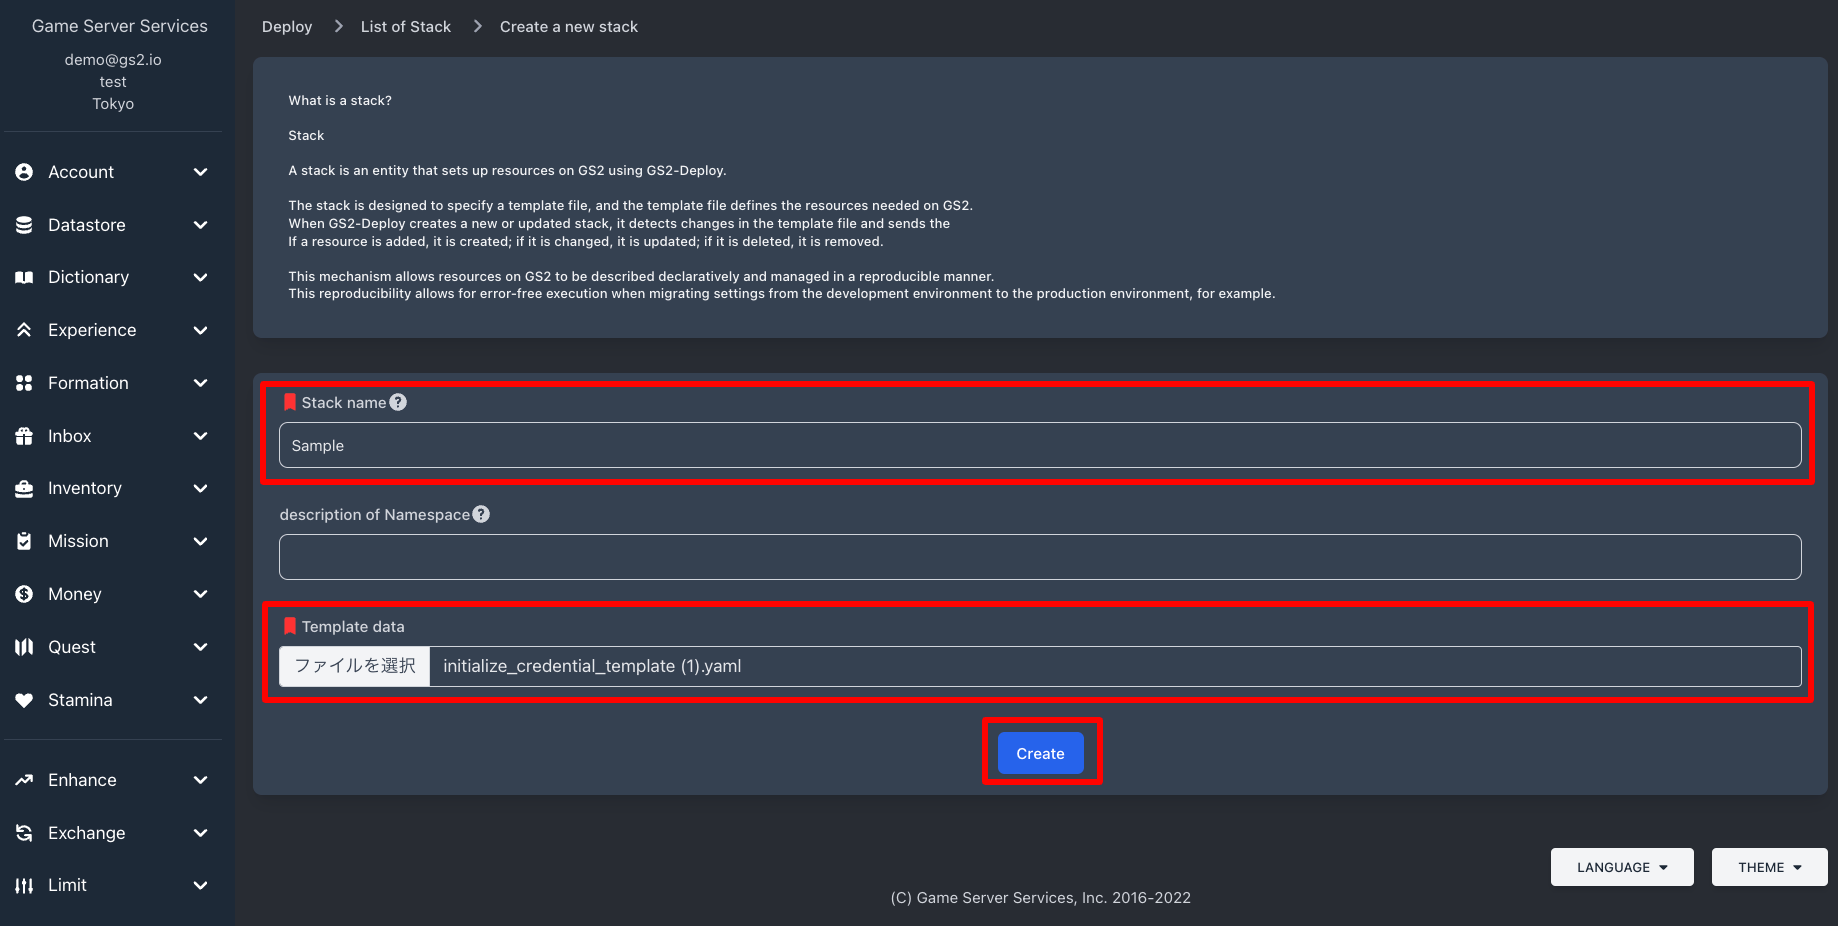
Let’s try to create a stack using a template.
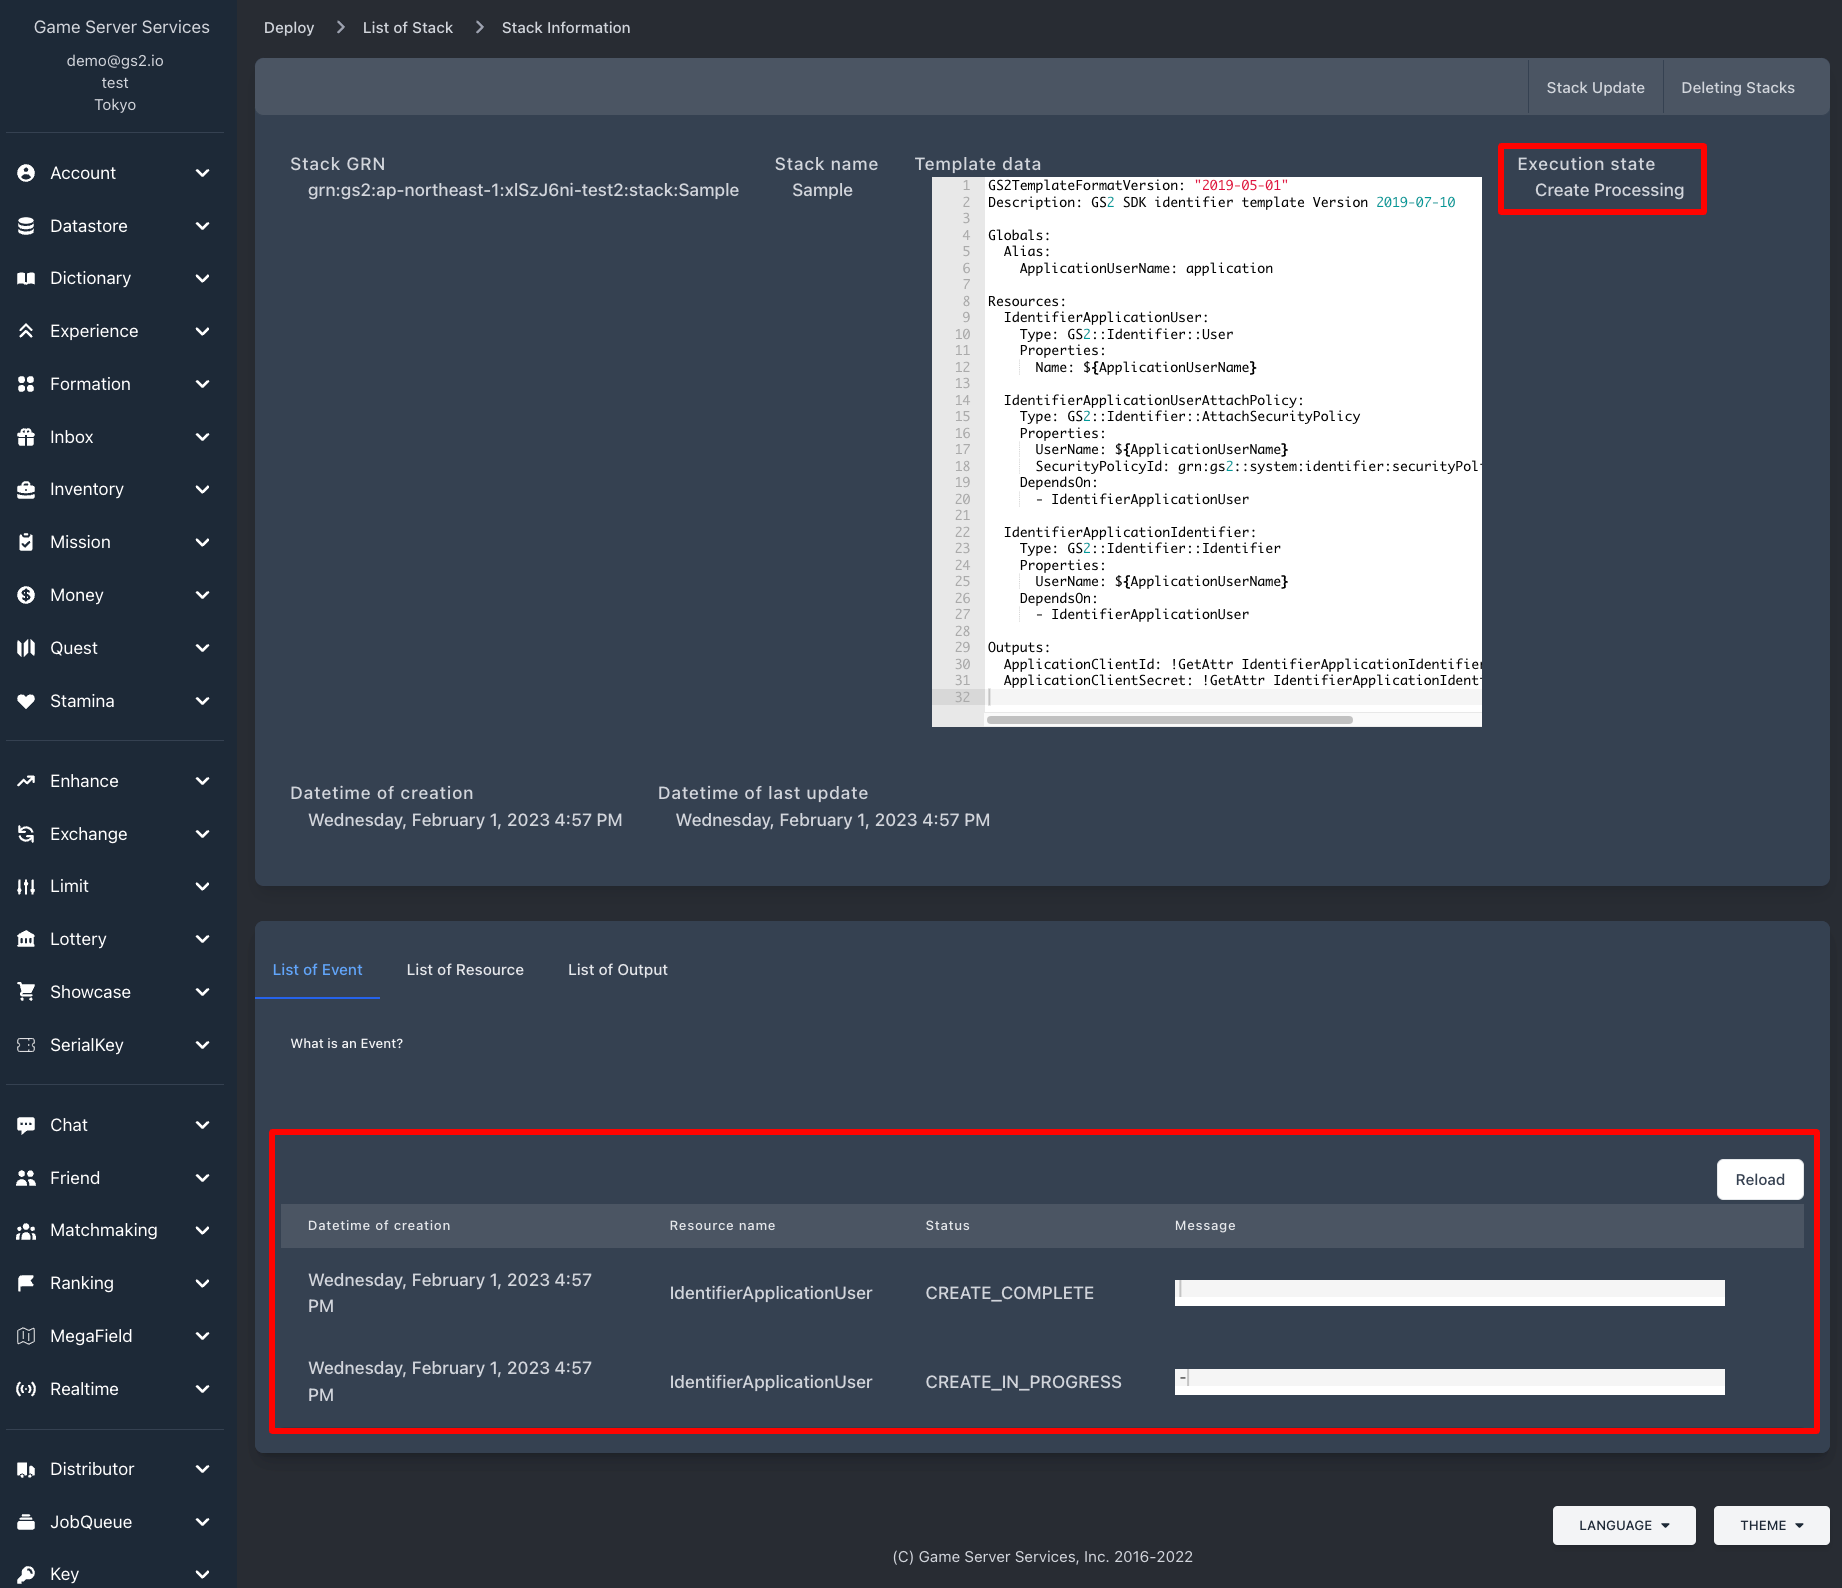
GS2TemplateFormatVersion: "2019-05-01"
Description: GS2 SDK identifier template Version 2019-07-10

Globals:
  Alias:
    ApplicationUserName: application

Resources:
  IdentifierApplicationUser:
    Type: GS2::Identifier::User
    Properties:
      Name: ${ApplicationUserName}

  IdentifierApplicationUserAttachPolicy:
    Type: GS2::Identifier::AttachSecurityPolicy
    Properties:
      UserName: ${ApplicationUserName}
      SecurityPolicyId: grn:gs2::system:identifier:securityPolicy:ApplicationAccess
    DependsOn:
      - IdentifierApplicationUser

  IdentifierApplicationIdentifier:
    Type: GS2::Identifier::Identifier
    Properties:
      UserName: ${ApplicationUserName}
    DependsOn:
      - IdentifierApplicationUser

Outputs:
  ApplicationClientId: !GetAttr IdentifierApplicationIdentifier.Item.ClientId
  ApplicationClientSecret: !GetAttr IdentifierApplicationIdentifier.ClientSecret
The example shows a sample template that creates a user with ApplicationAccess privileges. You can change the user name created for the GS2-Identifier by changing the ApplicationUserName: application part.
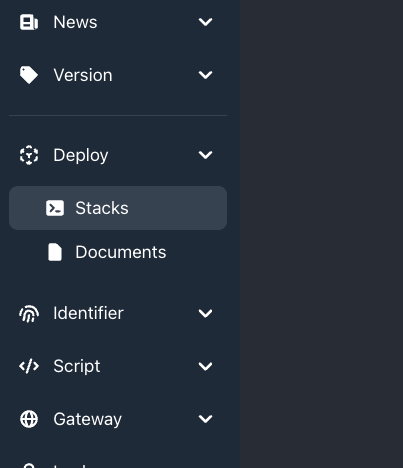
Save this template file. Continue by selecting Deploy > Stacks from the side menu of the Management Console.
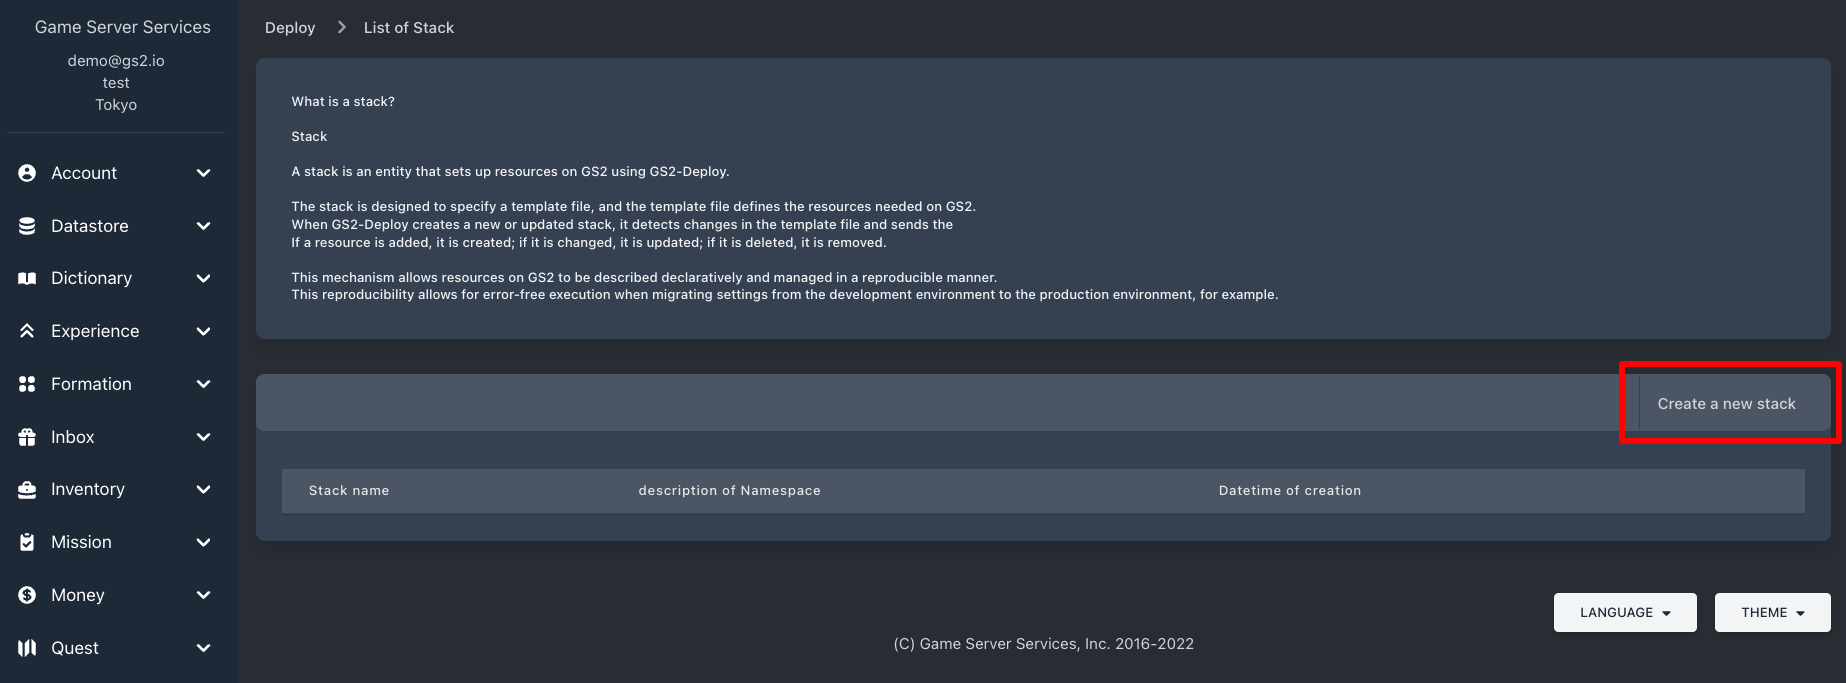
Create a stack by specifying it as template data in Create New Stack.
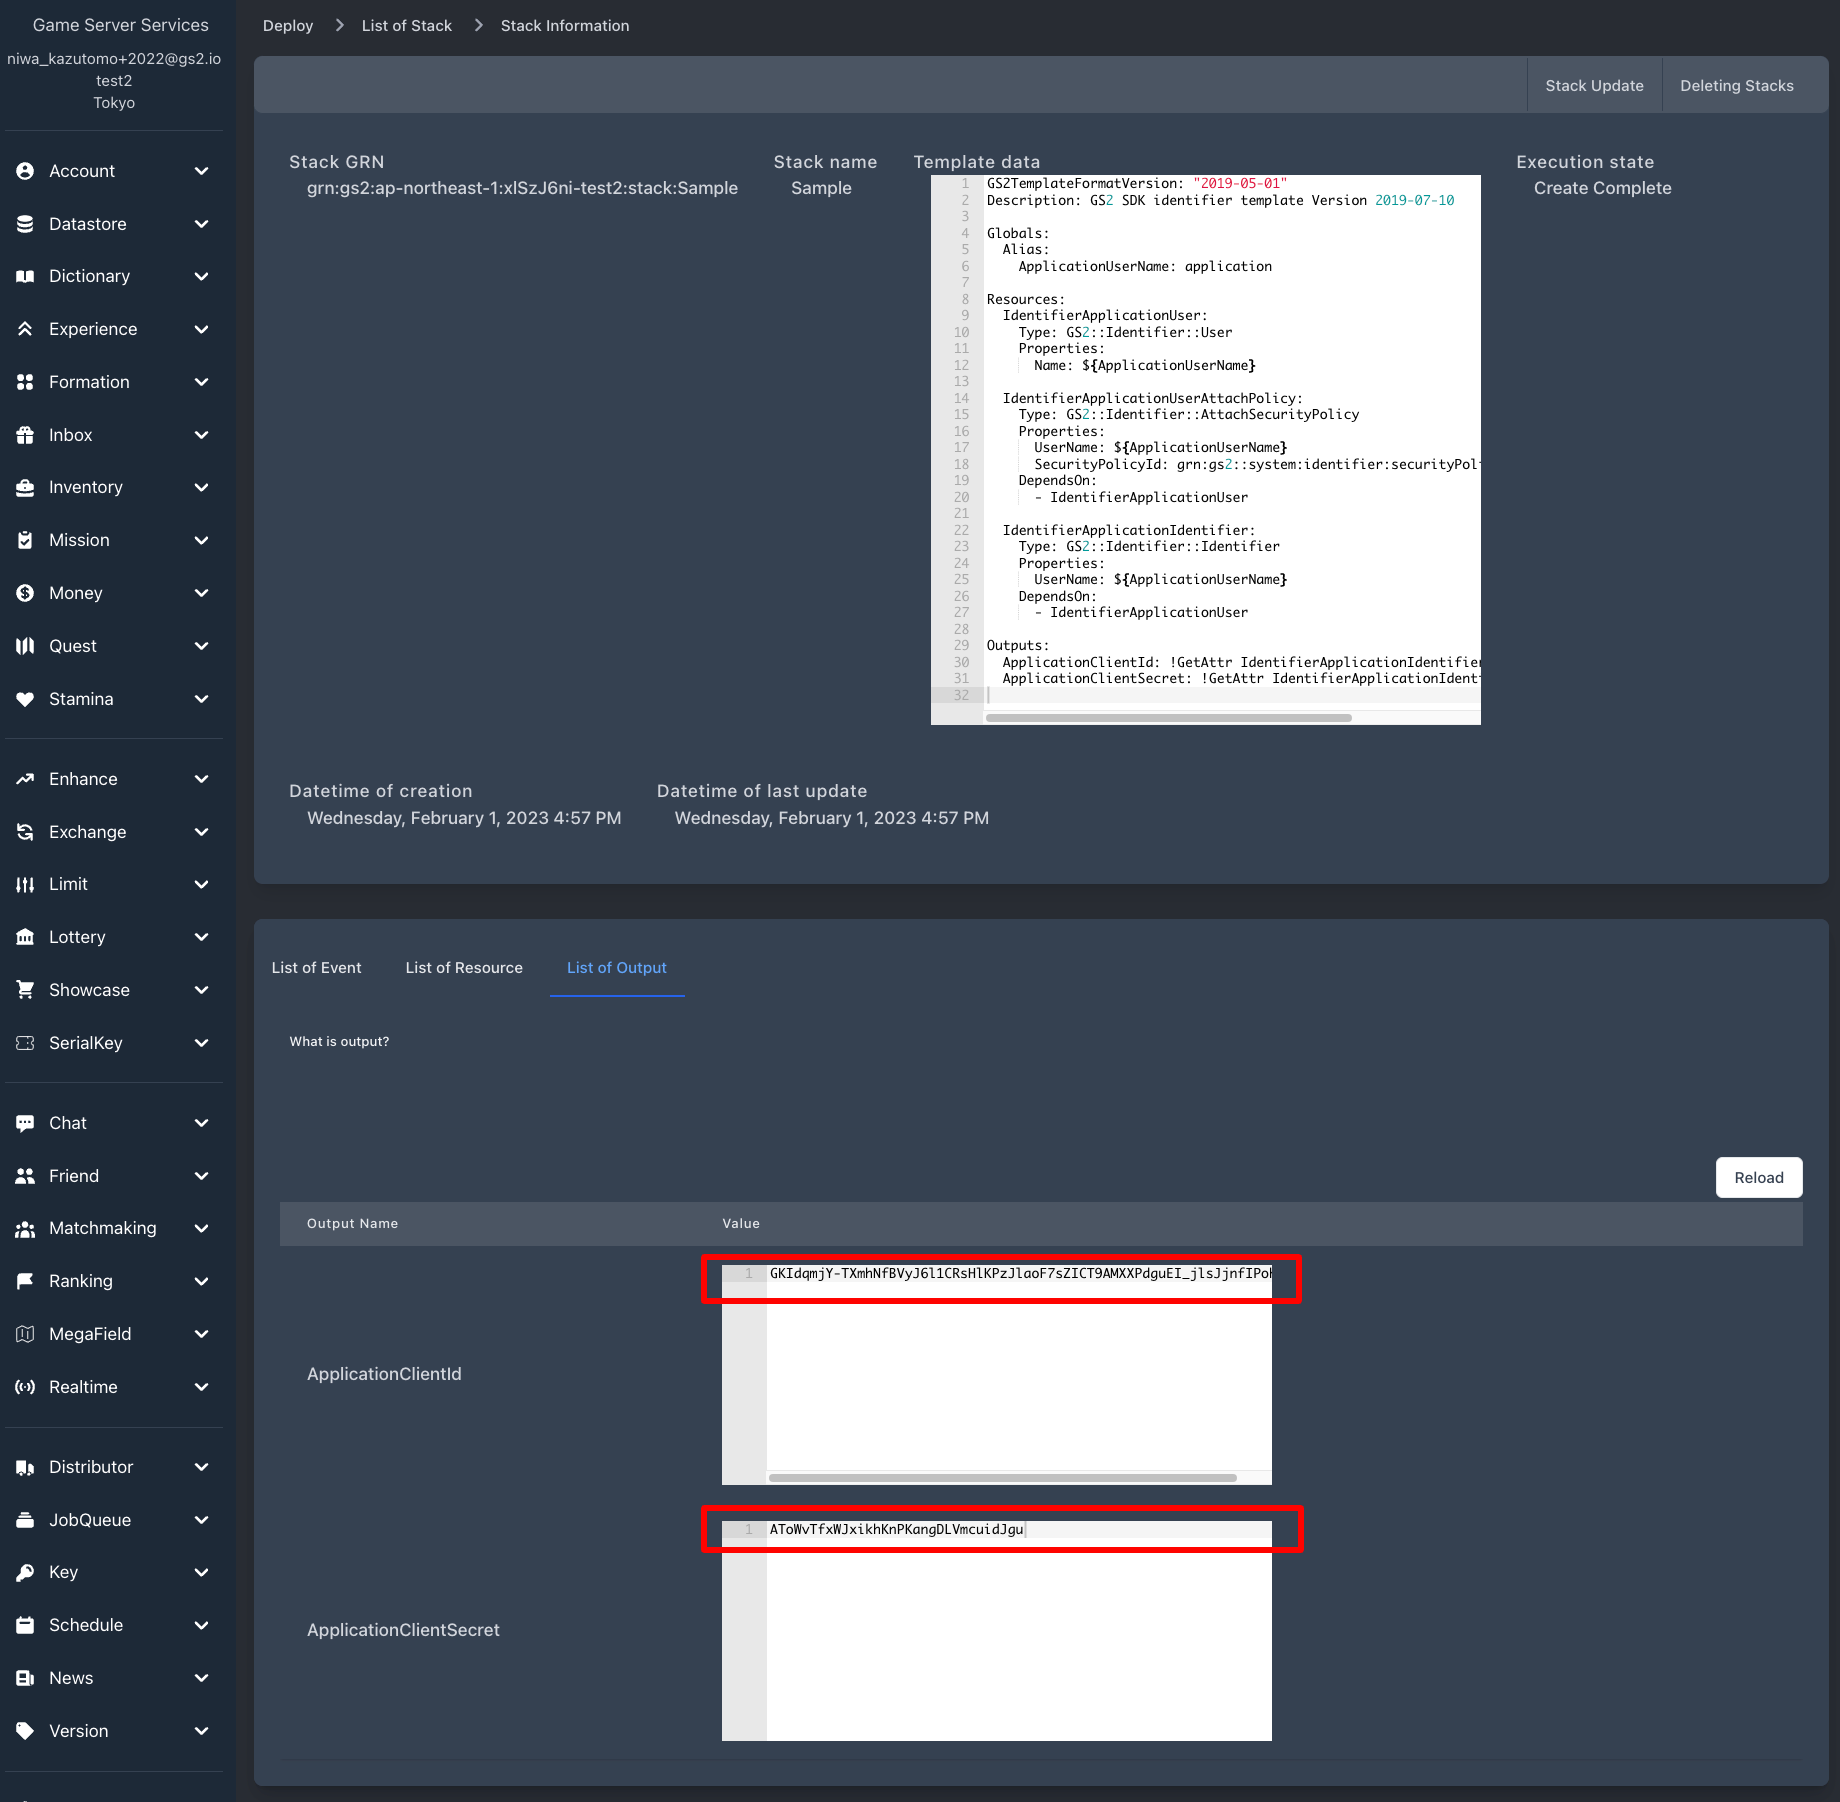
You can check the status of the settings registered in the created stack in the “Execution status” section of the stack.
After a few seconds, CREATE_COMPLETE is displayed and the credential setting is complete.
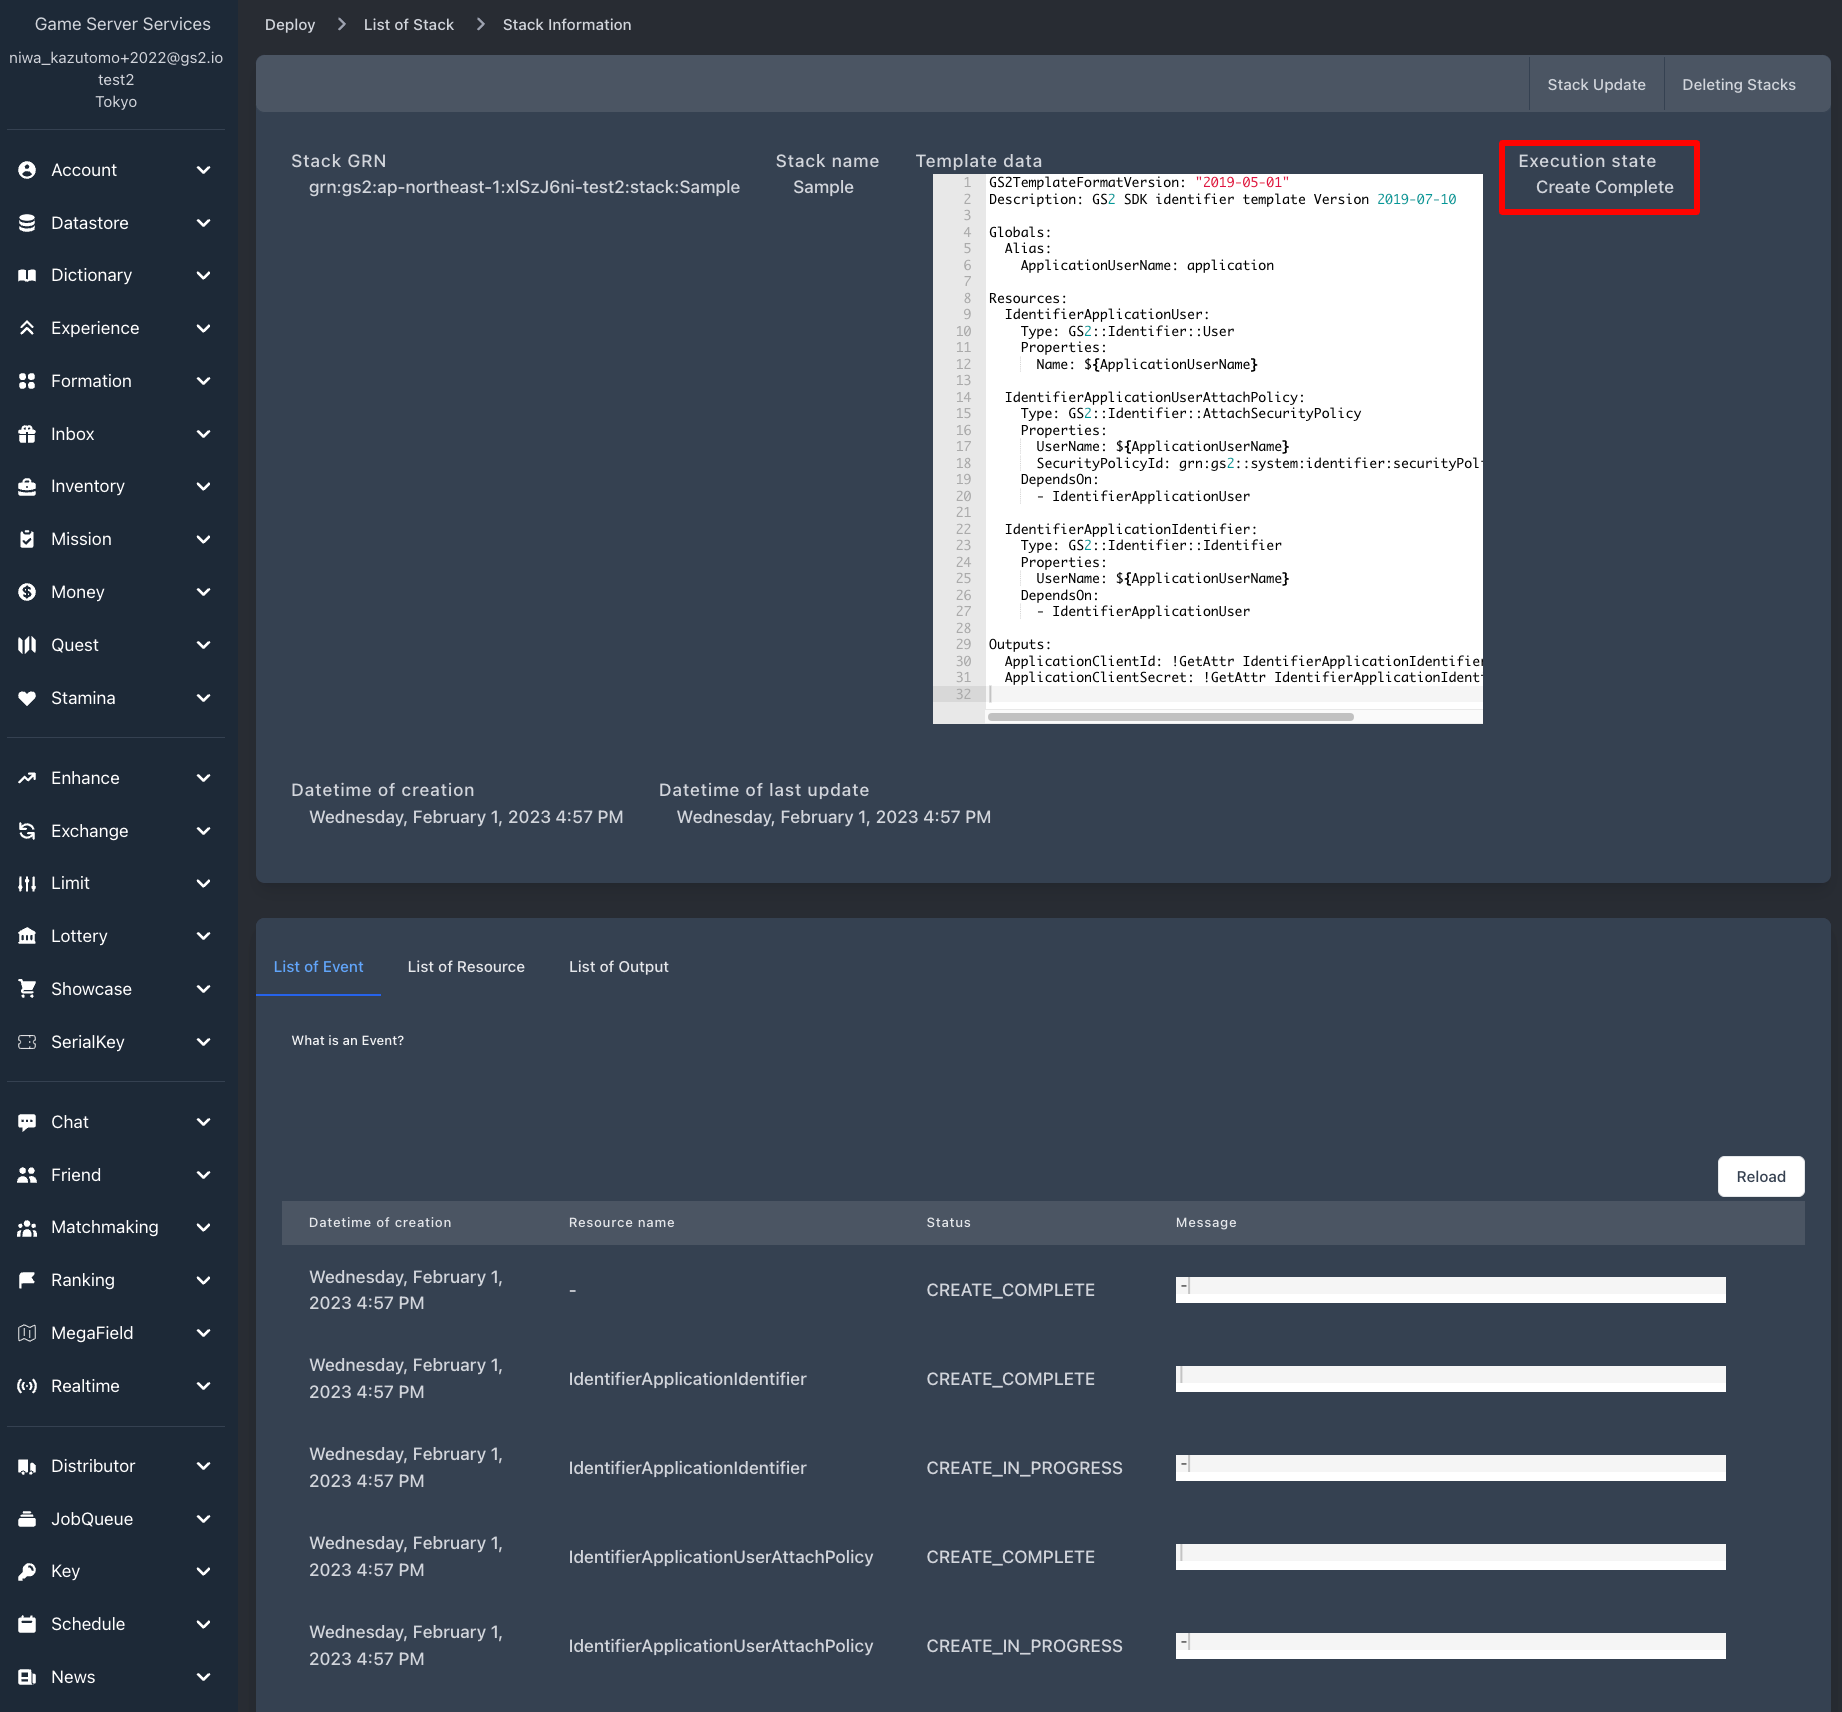
After reflection is complete, select the Output tab and you will see the Client ID and Client Secret for the credential. These values will be set in the game app later.