Prepare your development environment
Prepare a GS2 tutorial project and an empty Unity scene. The GS2 account created here is a developer account for managing game settings.
Screenshots show the Japanese interface. The steps below use English interface labels.
1. Register with GS2
Register a developer account on the GS2 website (new tab). Verify your email address using the link you receive, then log in to the management console (new tab).
2. Create a tutorial project
- Open Project → Project list → Create project.
- Enter
adventureas the name and “Adventure game practice” as the description. - Select Tokyo as the first region to enable. The tutorial code also connects to Tokyo (
ap-northeast-1). - Review the plan and other details, then click Create.
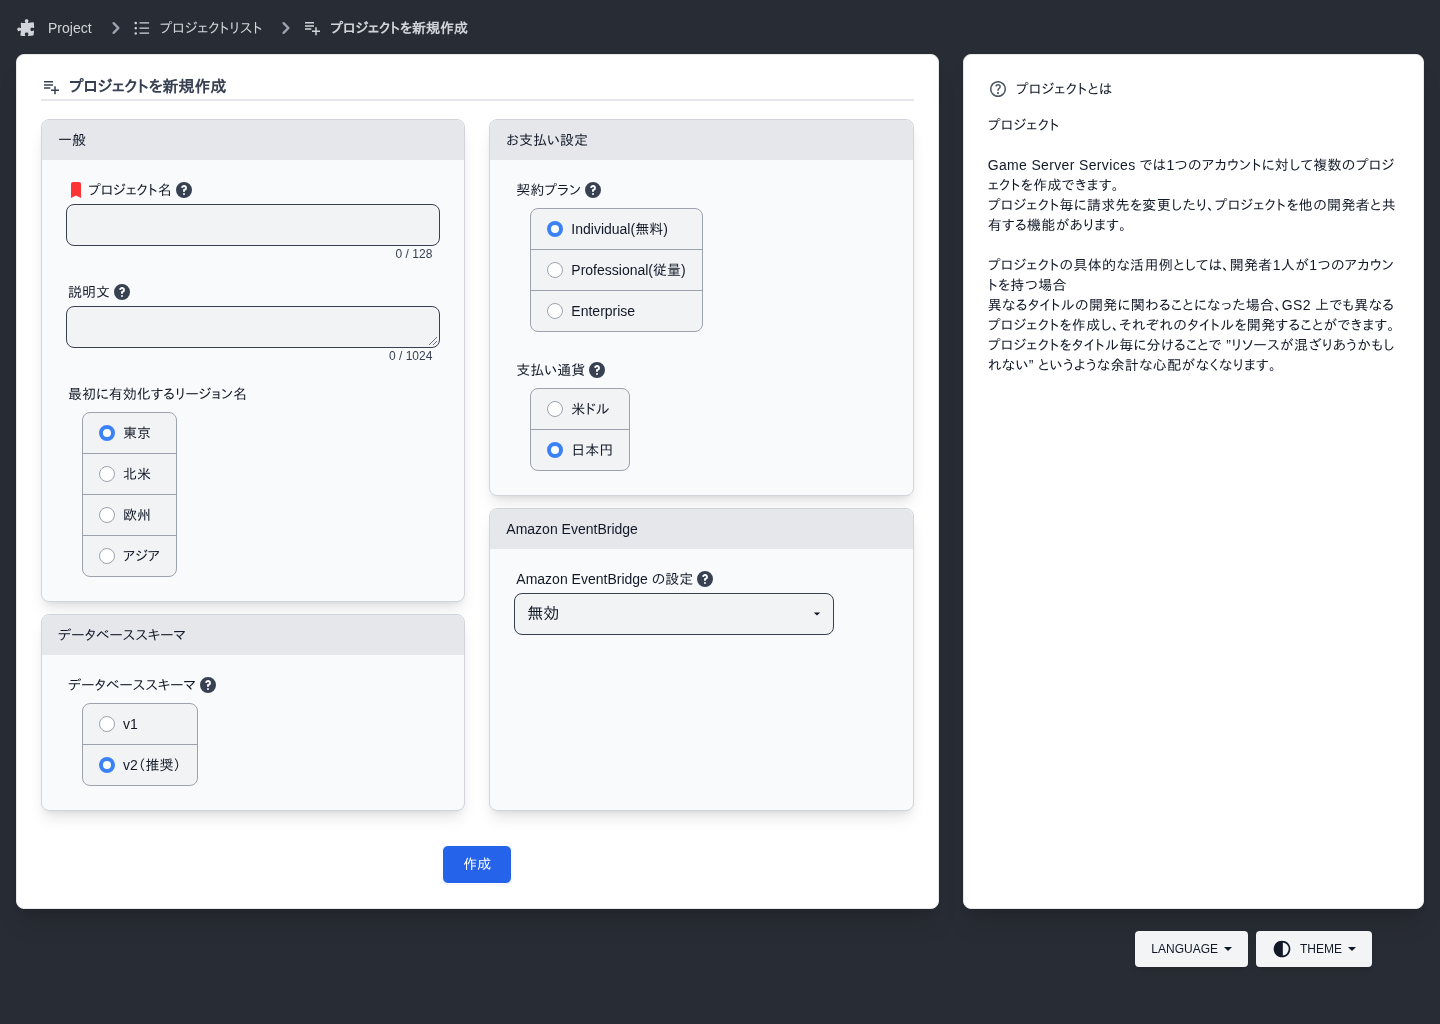
Project names can contain letters, numbers, hyphens, and underscores. If you already have a tutorial project, you can use it with the Tokyo region enabled.
3. Find the connection credentials for Unity
In your project’s Tokyo region, open Deploy → Stack list → Default → Output list. Use these two values in Unity’s connection settings.
| Output name | Unity field |
|---|---|
ApplicationClientId | Client ID |
ApplicationClientSecret | Client Secret |
4. Prepare Unity and tools
Create an empty Unity project and save the scene as Adventure.
With Studio, you choose features in the app and enter settings in tables. With SDK (Unity), you write GS2 settings and C# code yourself. Select a tab below to see the setup steps for that approach.
- Install the desktop app from the GS2 Studio download page (new tab).
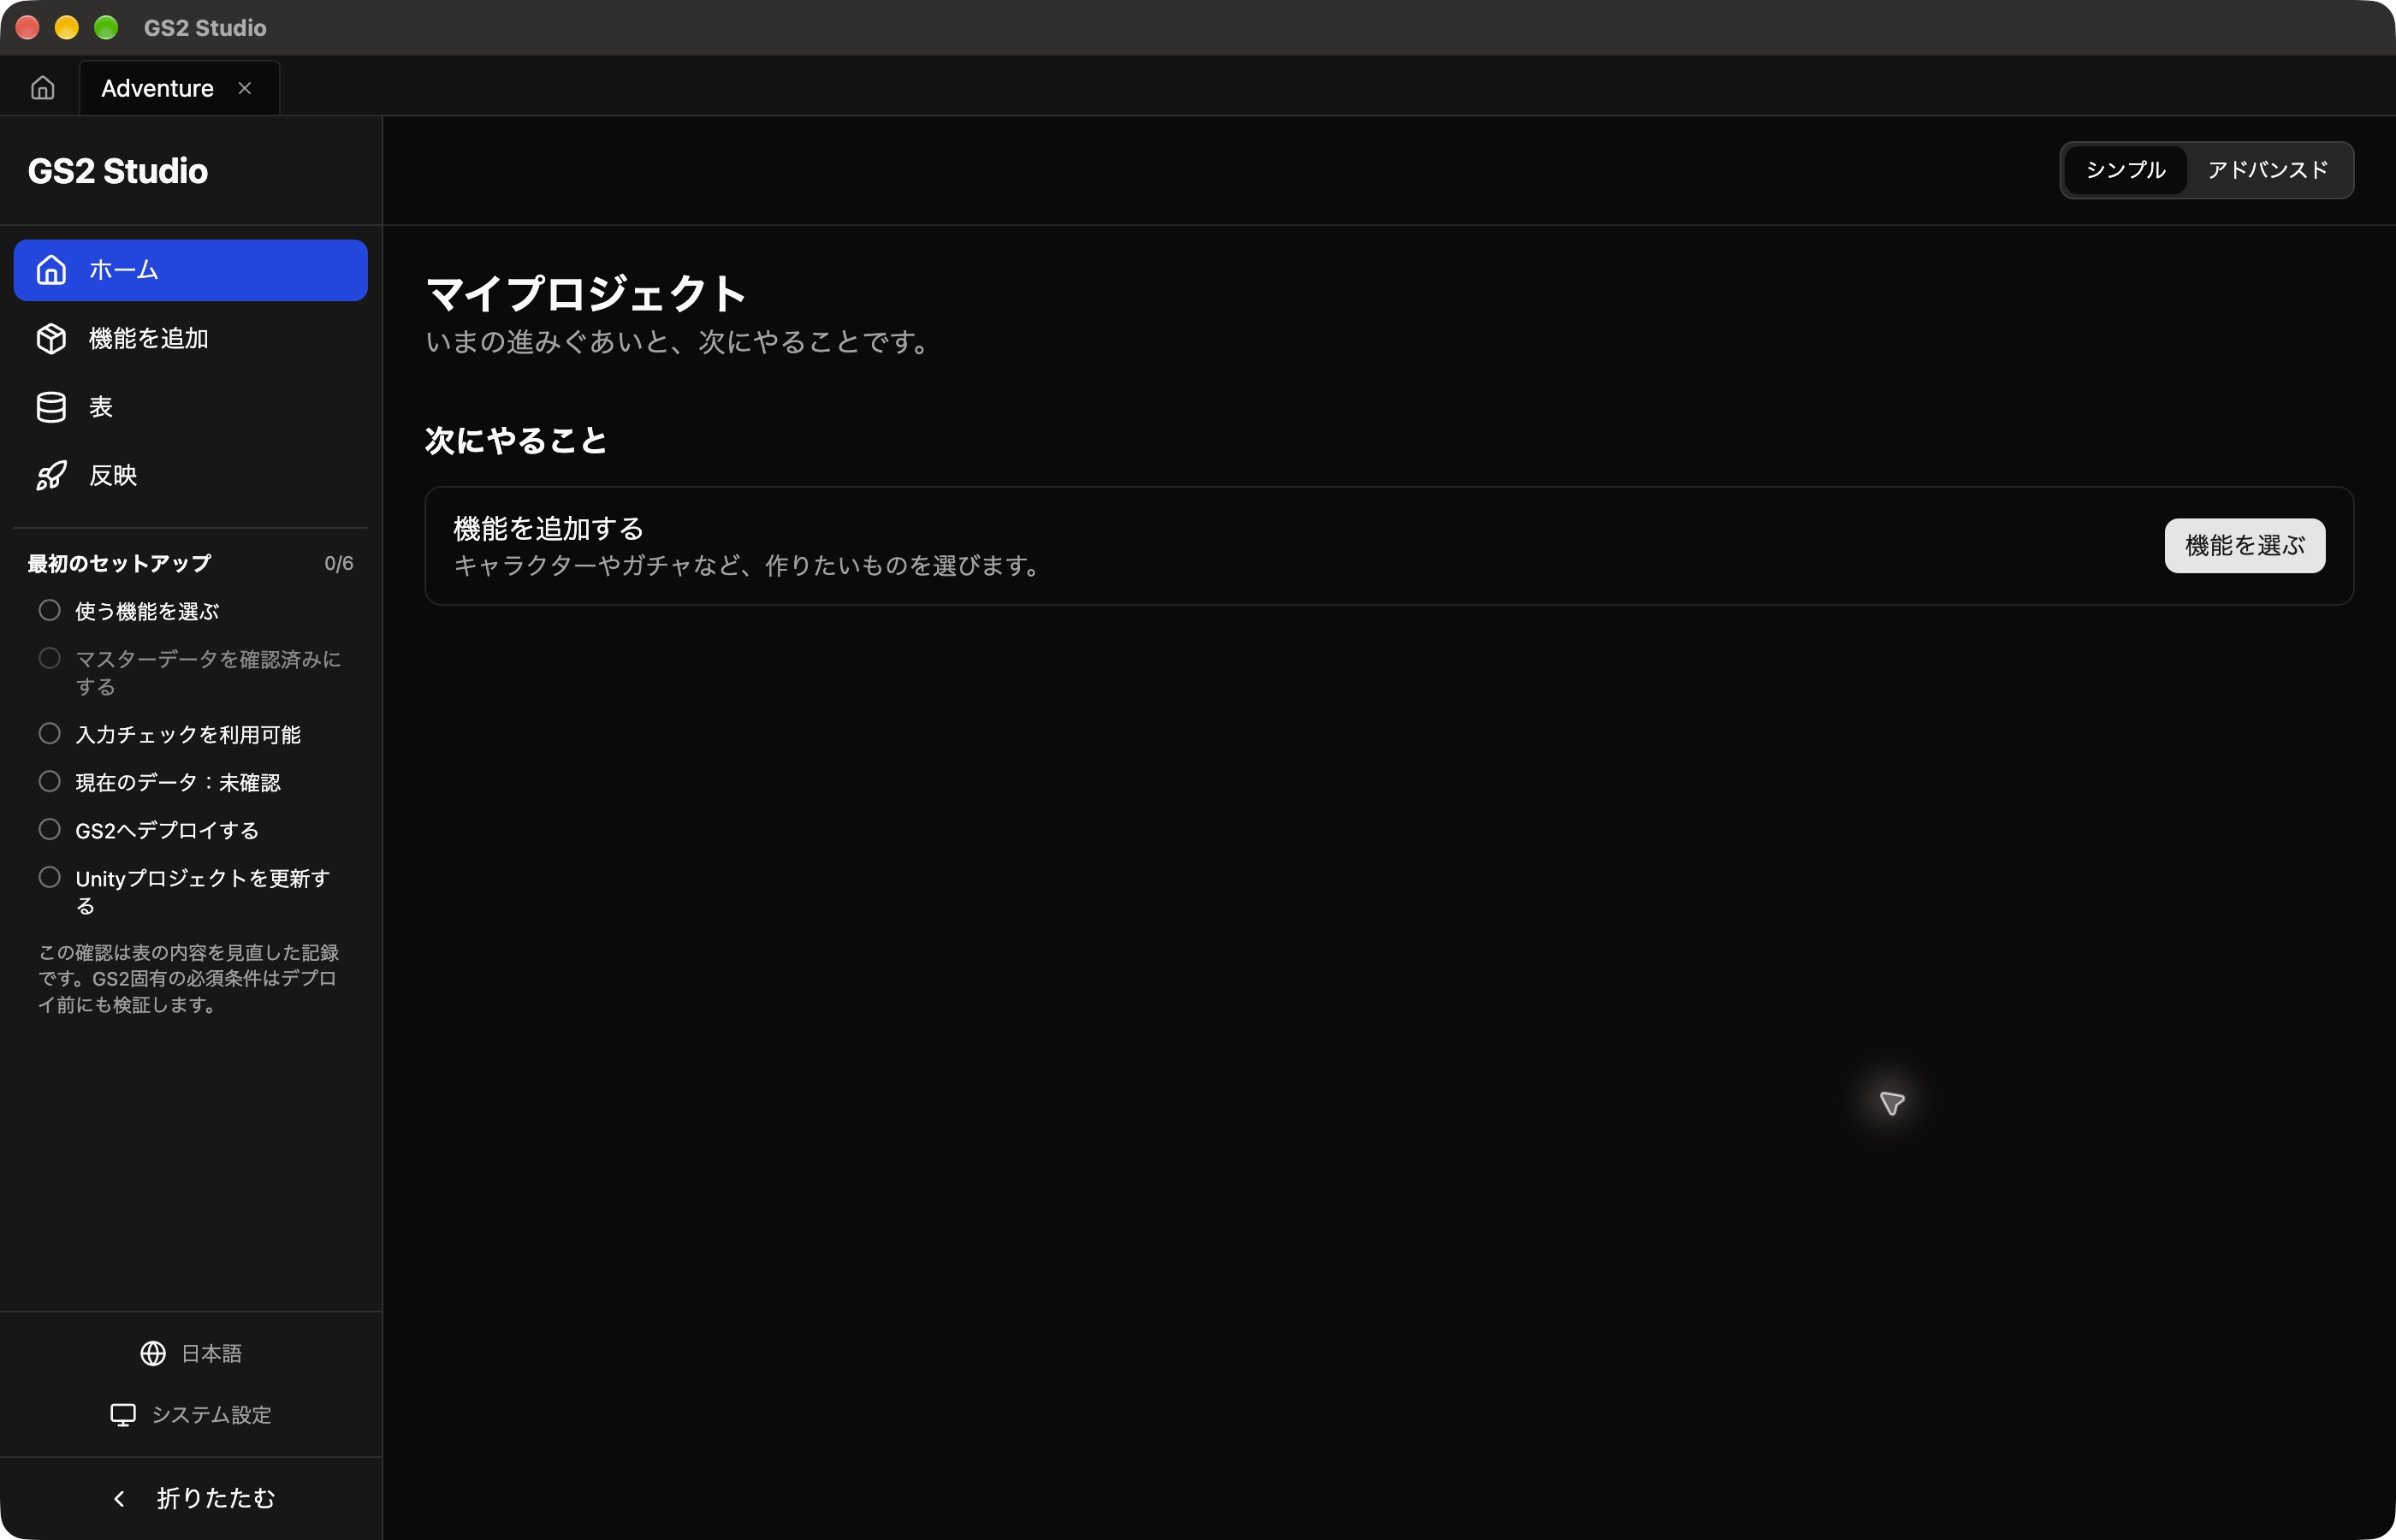
- On the start screen, choose Create project, name it
Adventure, and choose a folder. This project stores the design files on your computer. - Select Simple at the top right. The left sidebar shows Home, Add features, Tables, and Publish.
- Download the GS2 SDK for Unity installer.
- In Unity, choose Assets → Import Package → Custom Package…, select the downloaded file, and click Import.
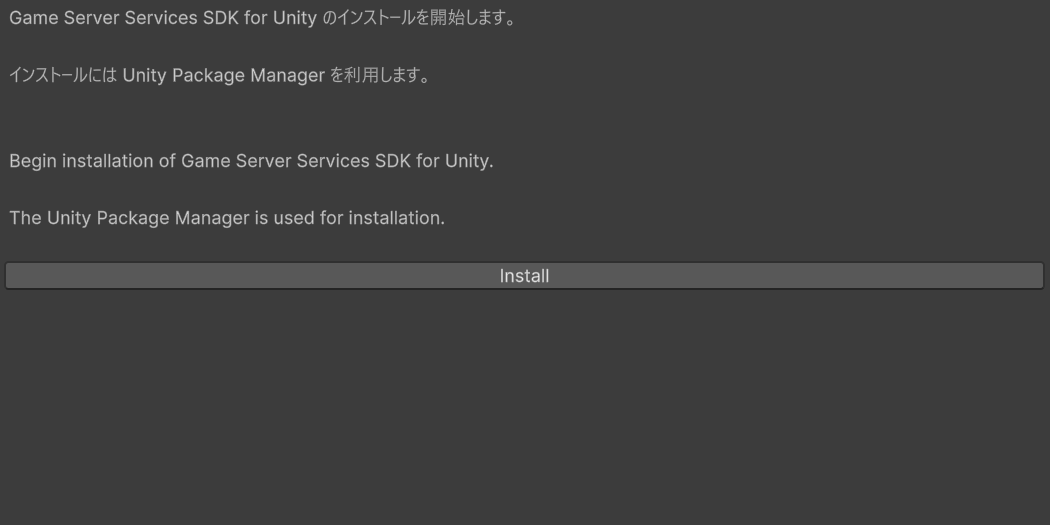
- Open Window → Game Server Services → SDK Installer and click Install.
- In Window → Package Manager, check that GS2 C# SDK and GS2 SDK for Unity have been added.
Install UniTask
The SDK examples in this tutorial use UniTask’s async / await.
- In Window → Package Manager, search the installed packages for UniTask.
- If it is not installed, open + → Install package from git URL…, enter the following URL, and click Install.
https://github.com/Cysharp/UniTask.git?path=src/UniTask/Assets/Plugins/UniTask#2.5.11Once importing finishes, you can use SDK methods such as LoginAsync() and ModelAsync().