2. Add a quest and display the quest list
Now that login works, let’s add a list of adventures. Your first adventure will be Forest exploration. GS2 calls these adventures quests and organizes them into quest groups. Register this one as forest in the main quest group, then display its name in the game.
Prepare the game settings
Settings that you define, such as quest names and rewards, are called master data. A player’s coin balance and current quest progress are user data. Start by creating the master data for the quest list.
forest is the identifier your code uses to select the quest. Forest exploration is the name players see. Keeping them separate lets you change the displayed name without changing which quest your code refers to.
For now, configure the quest list and leave the starting cost and reward fields empty.
Steps
Add the Quest feature
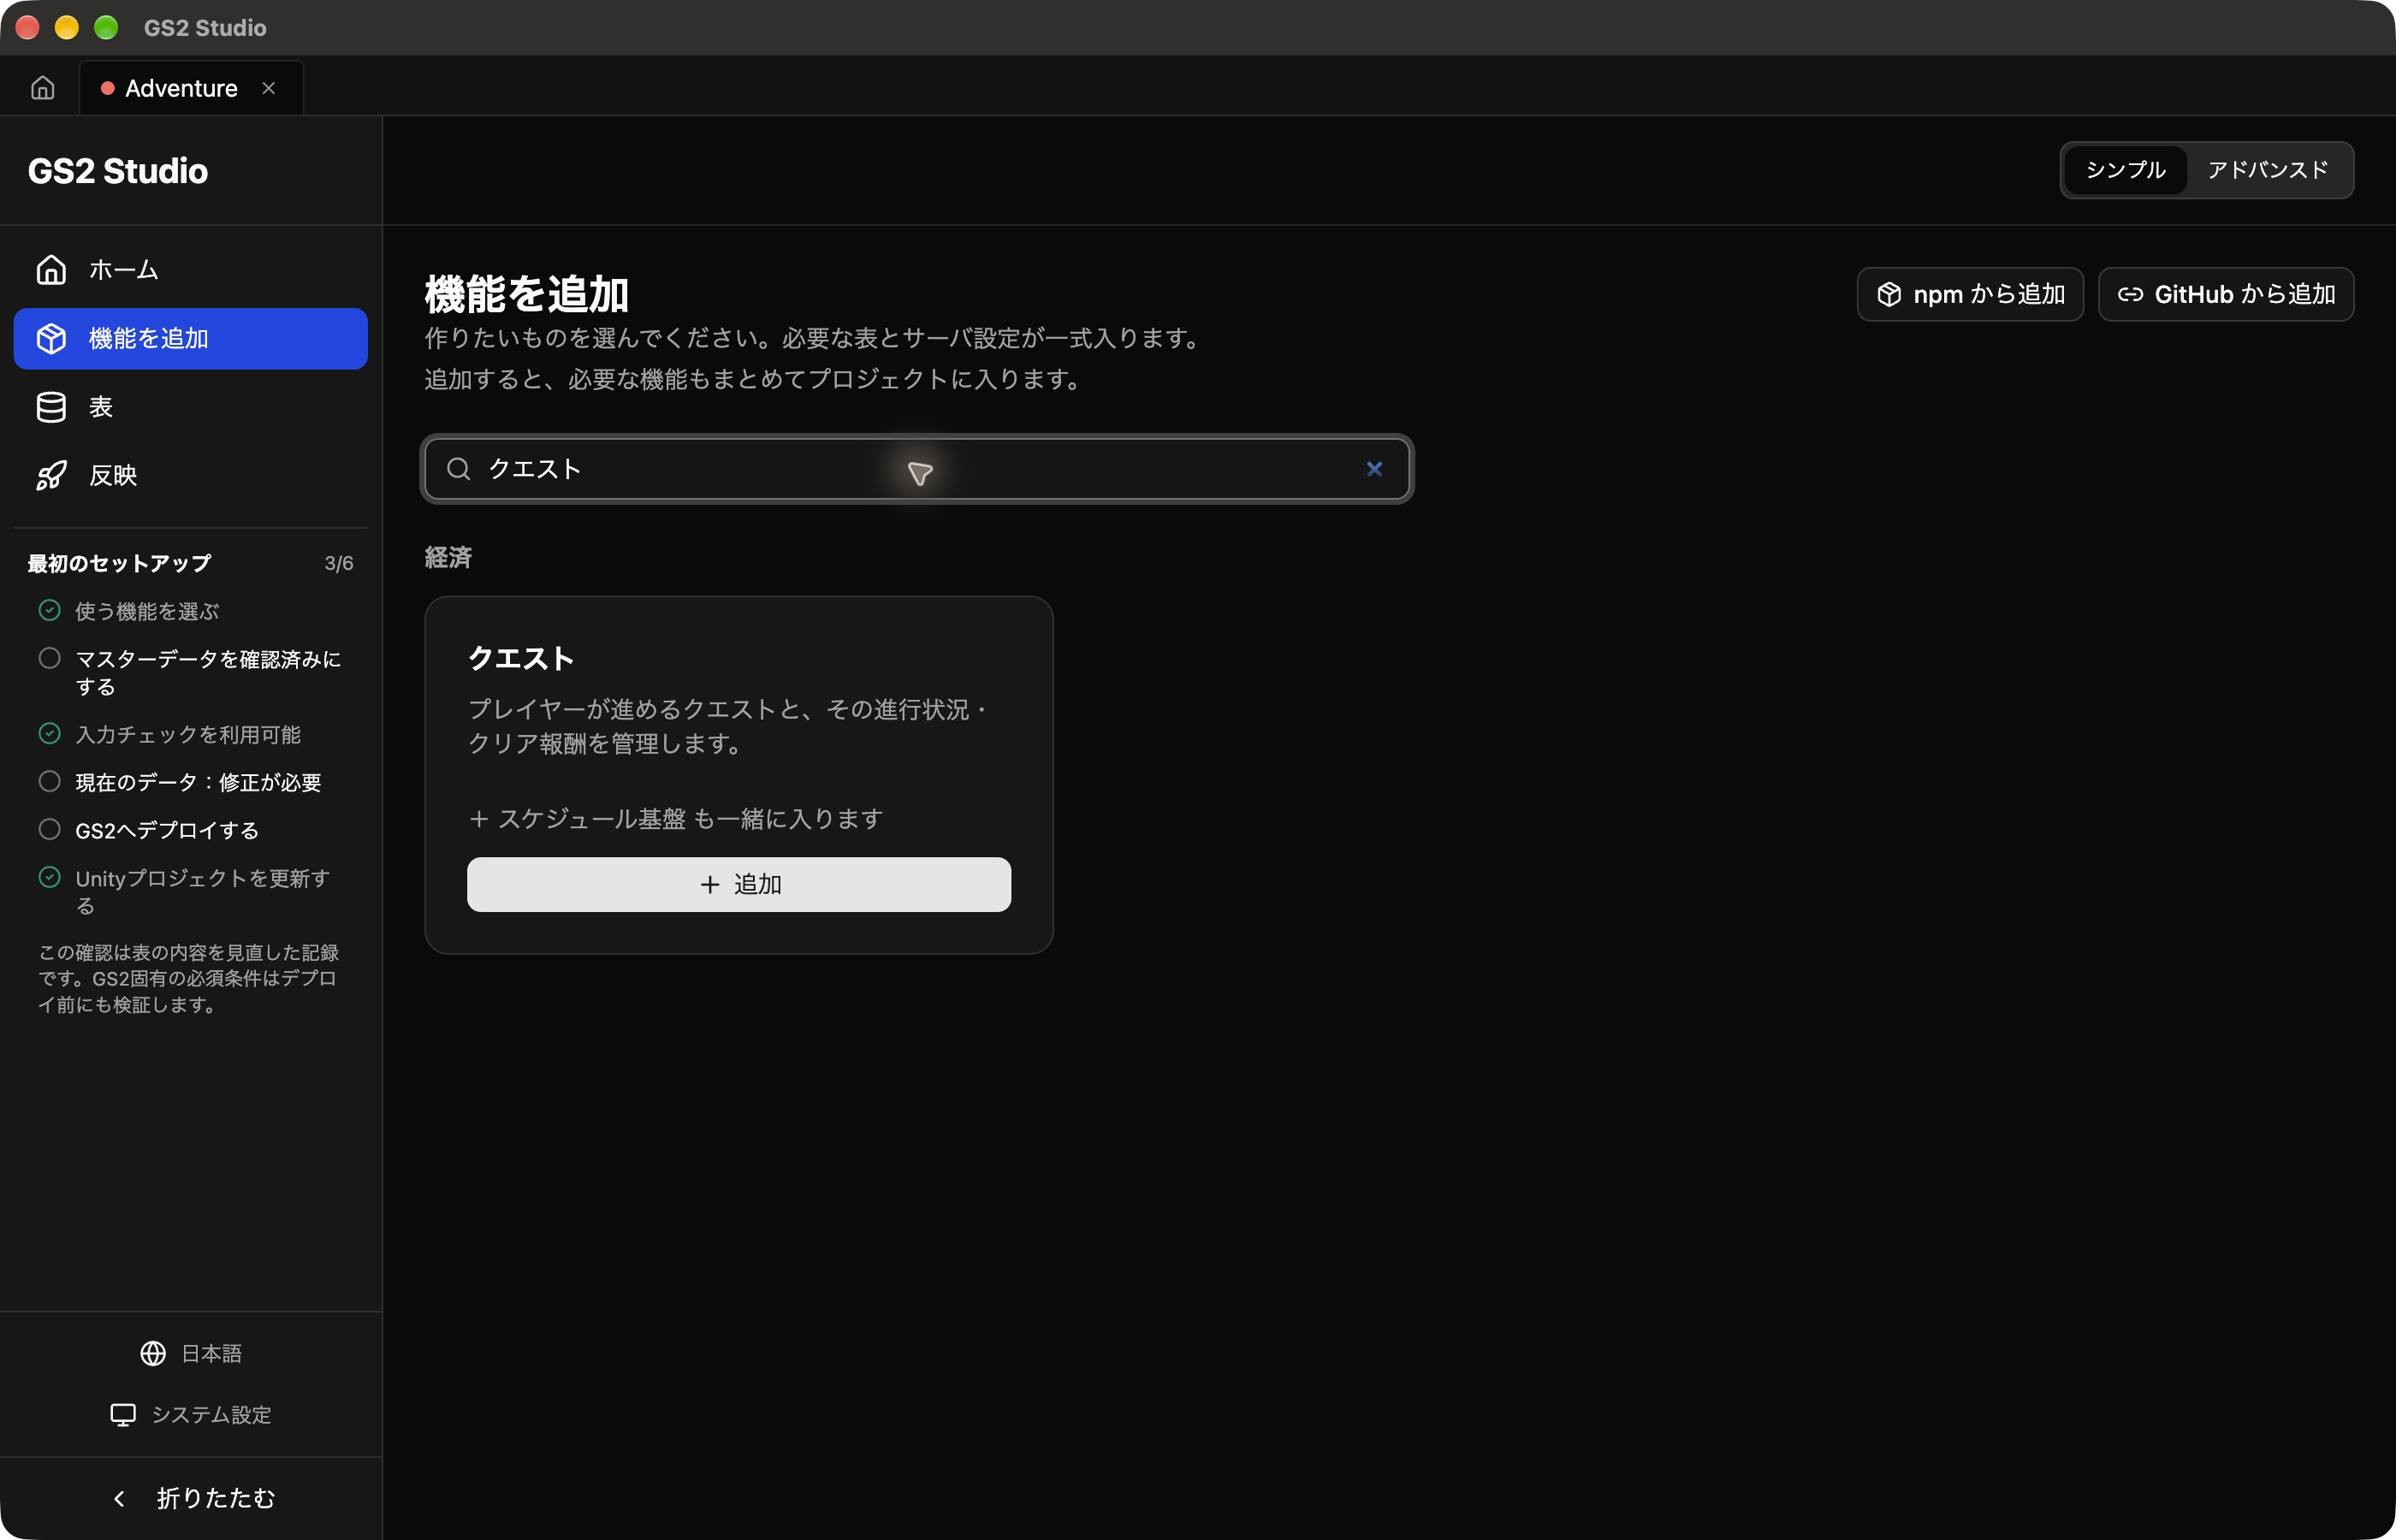
Open the Adventure project you used in Studio in chapter 1. Under Add features, search for Quests and click Add on its card.
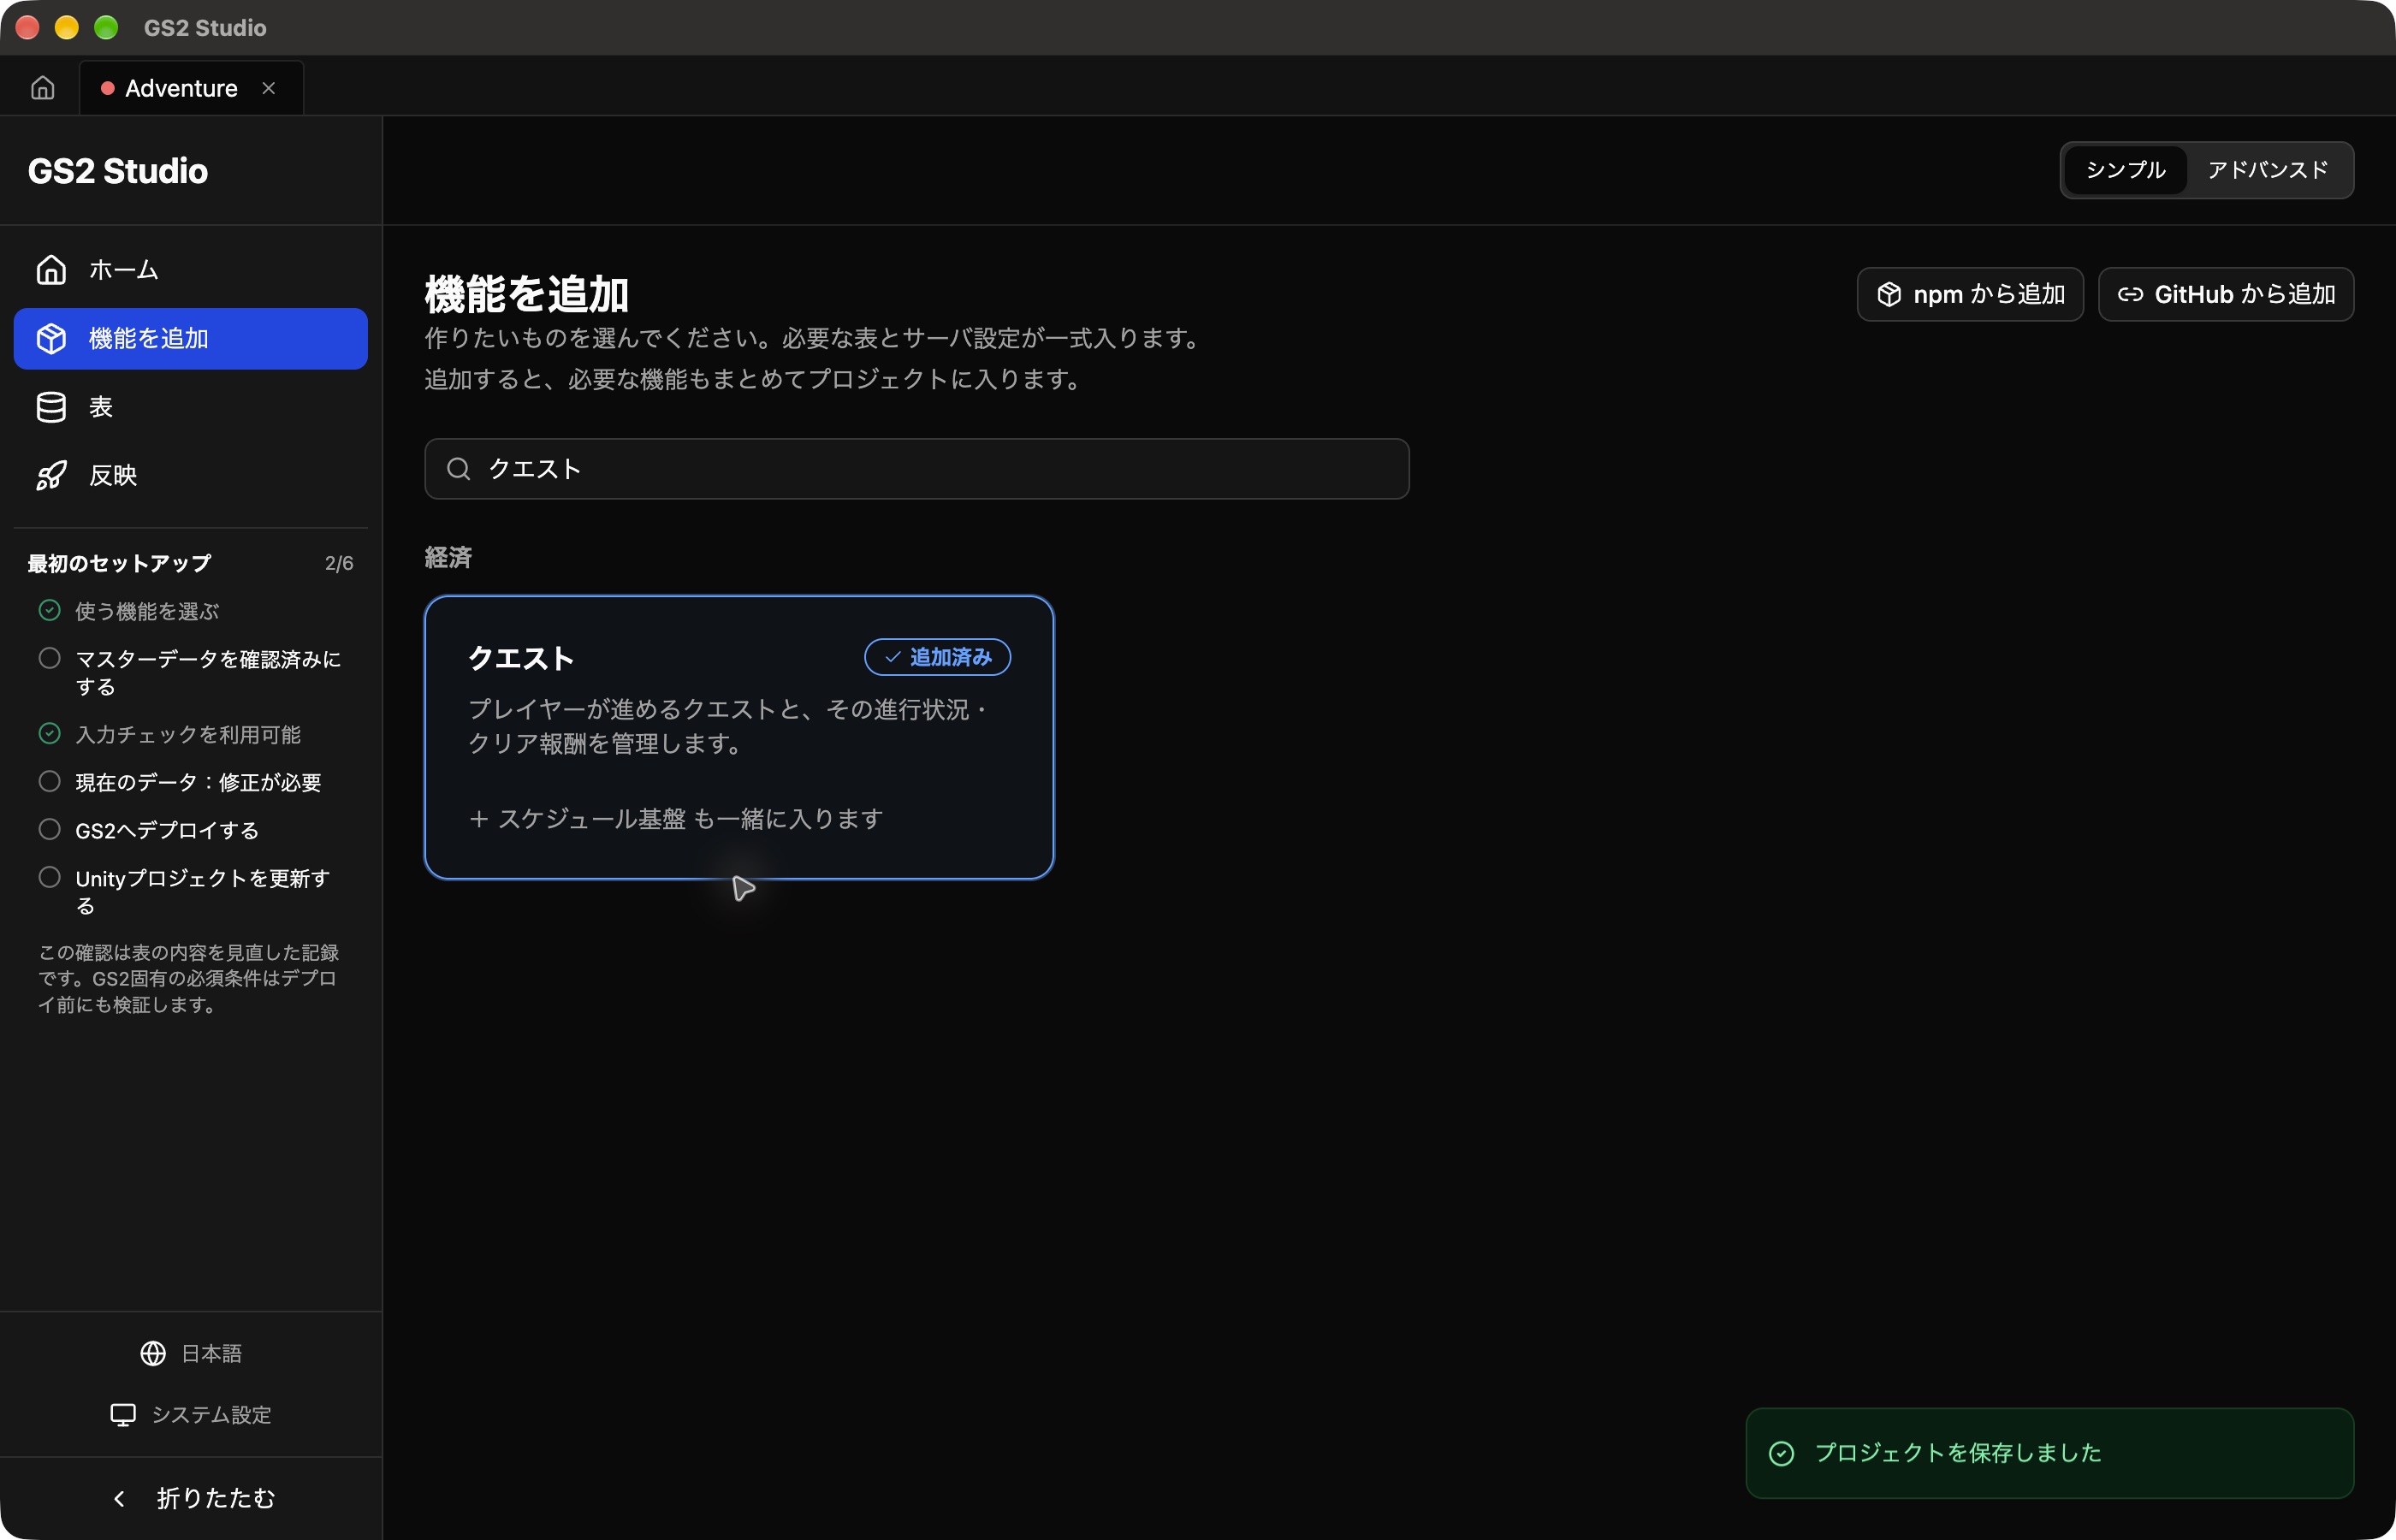
Wait until the card says Added. The Scheduling package that Quest uses is installed too.
Create a quest group
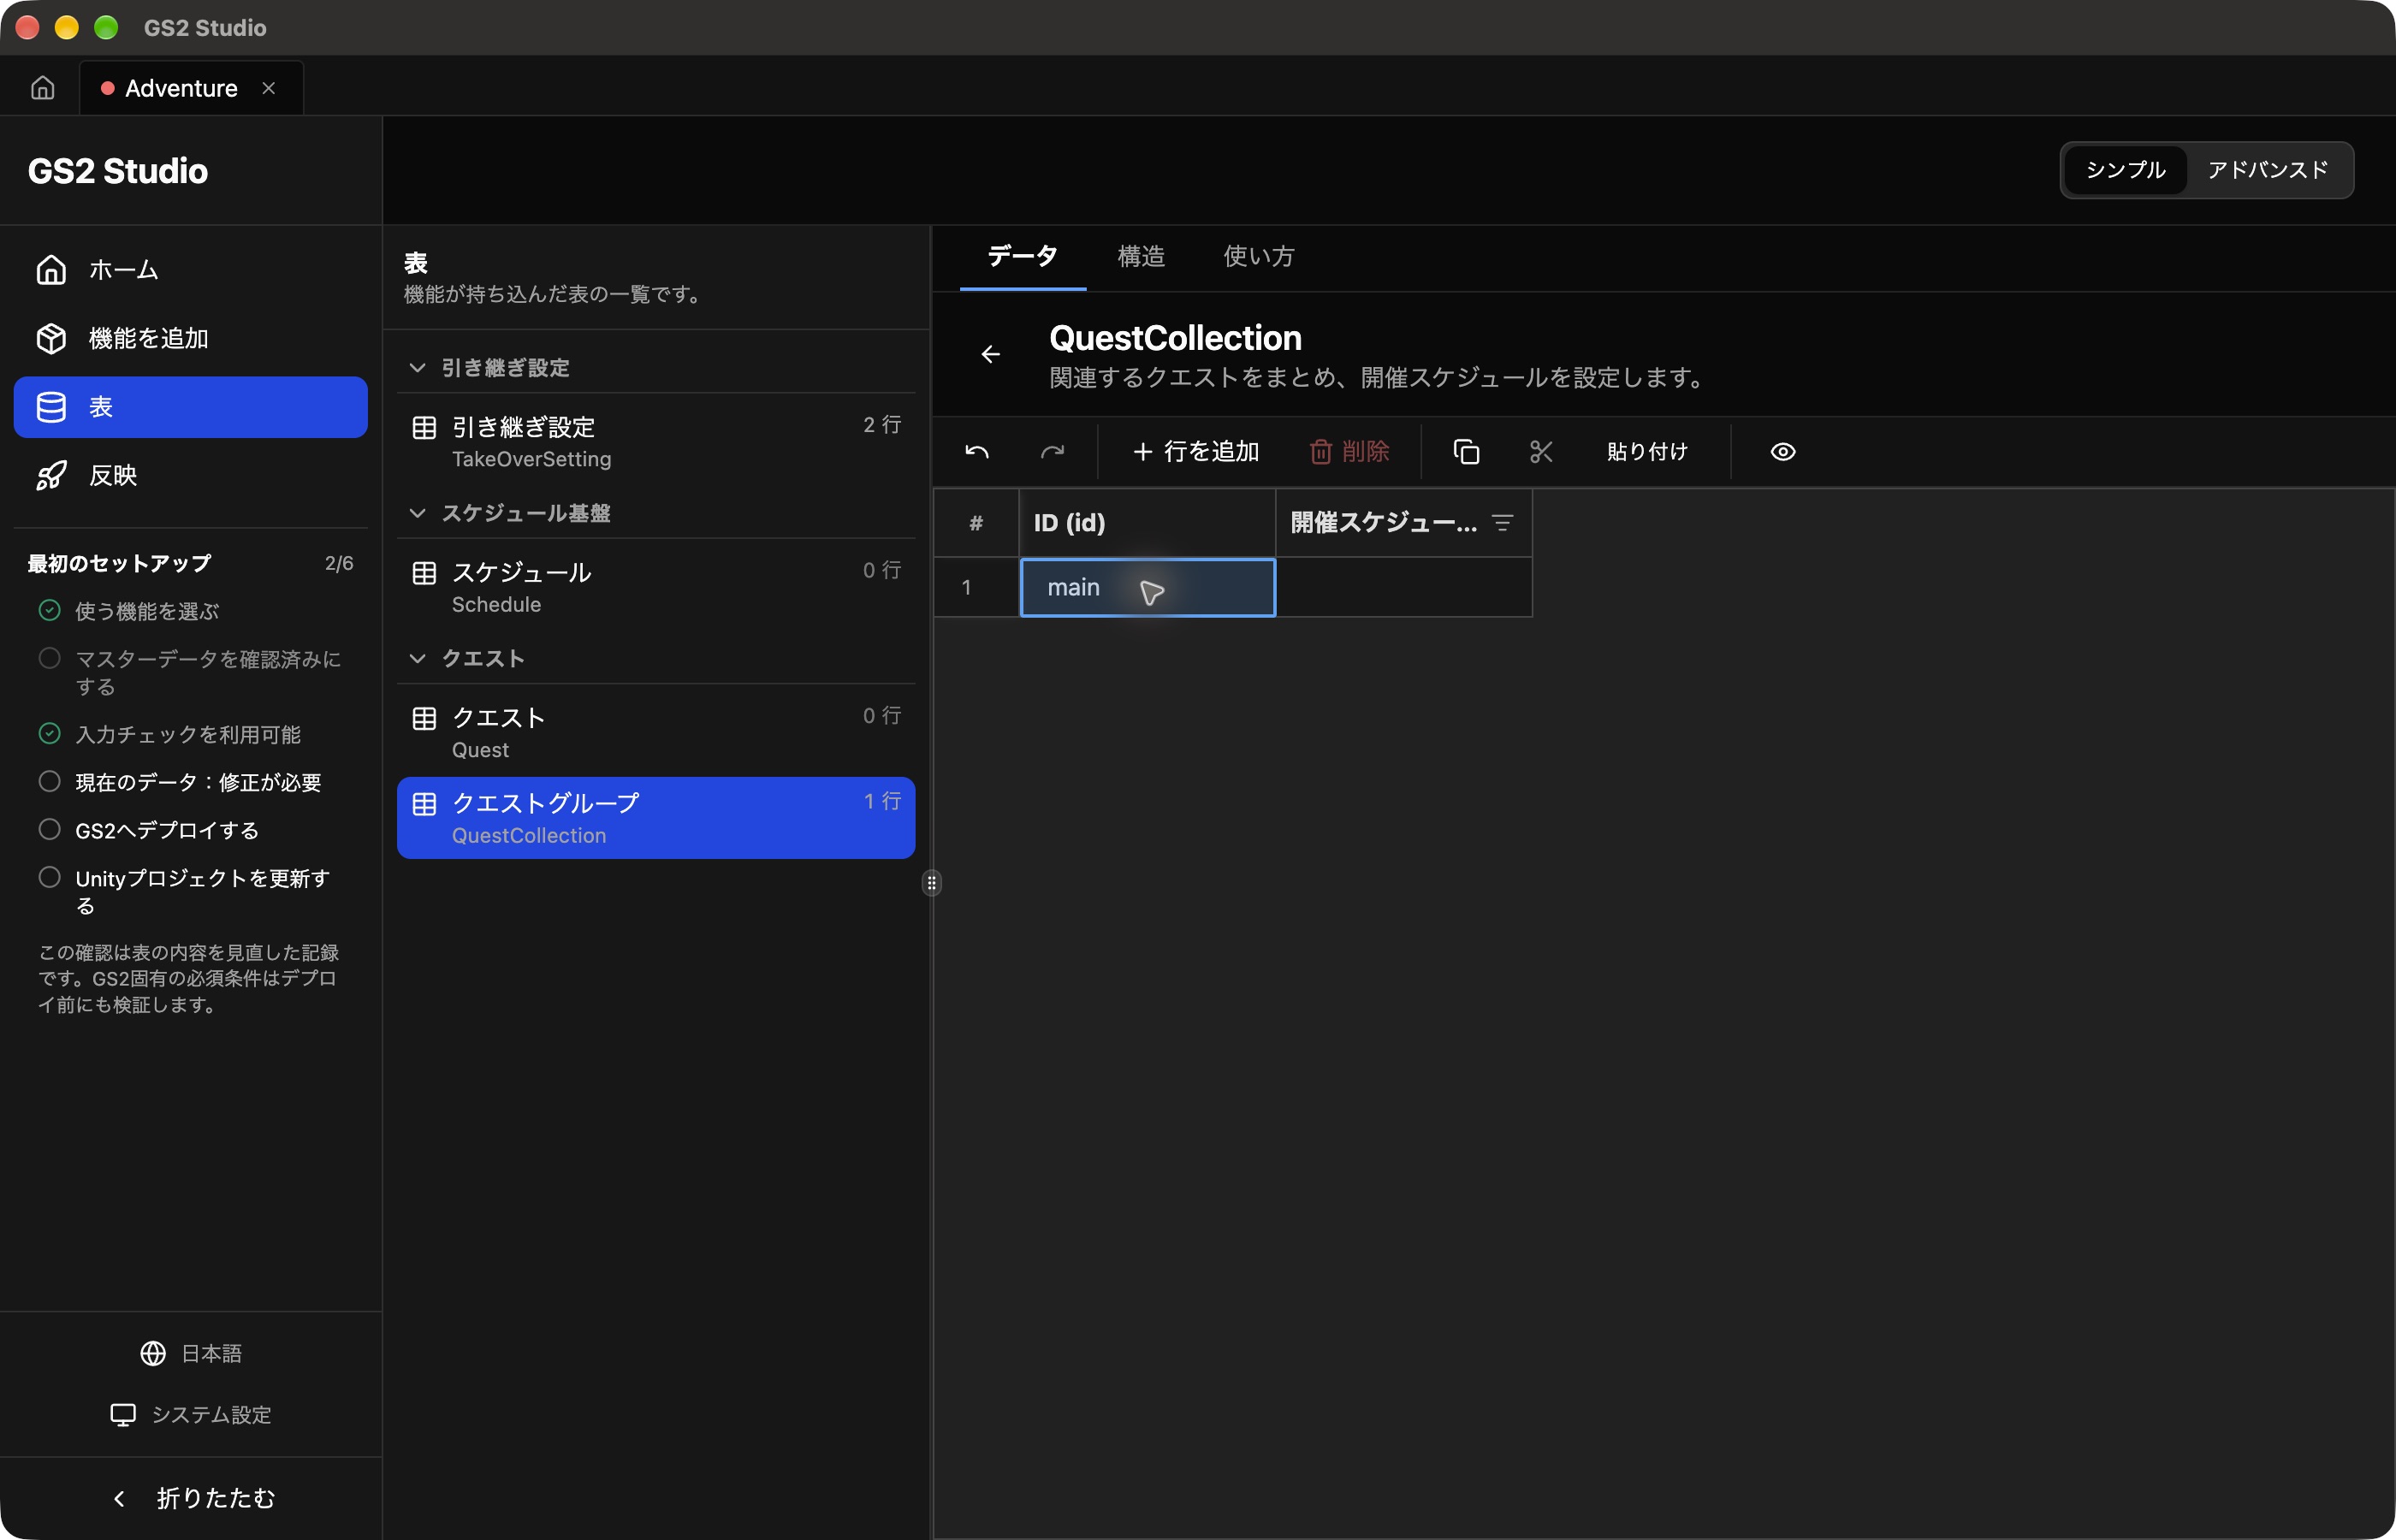
Open Tables → Quests → Quest group (QuestCollection) and click Add row. Select the ID cell, press Enter, type main, and press Enter again to confirm. Leave the schedule empty.
Add a display name column
Add a column for the name to display in the game.
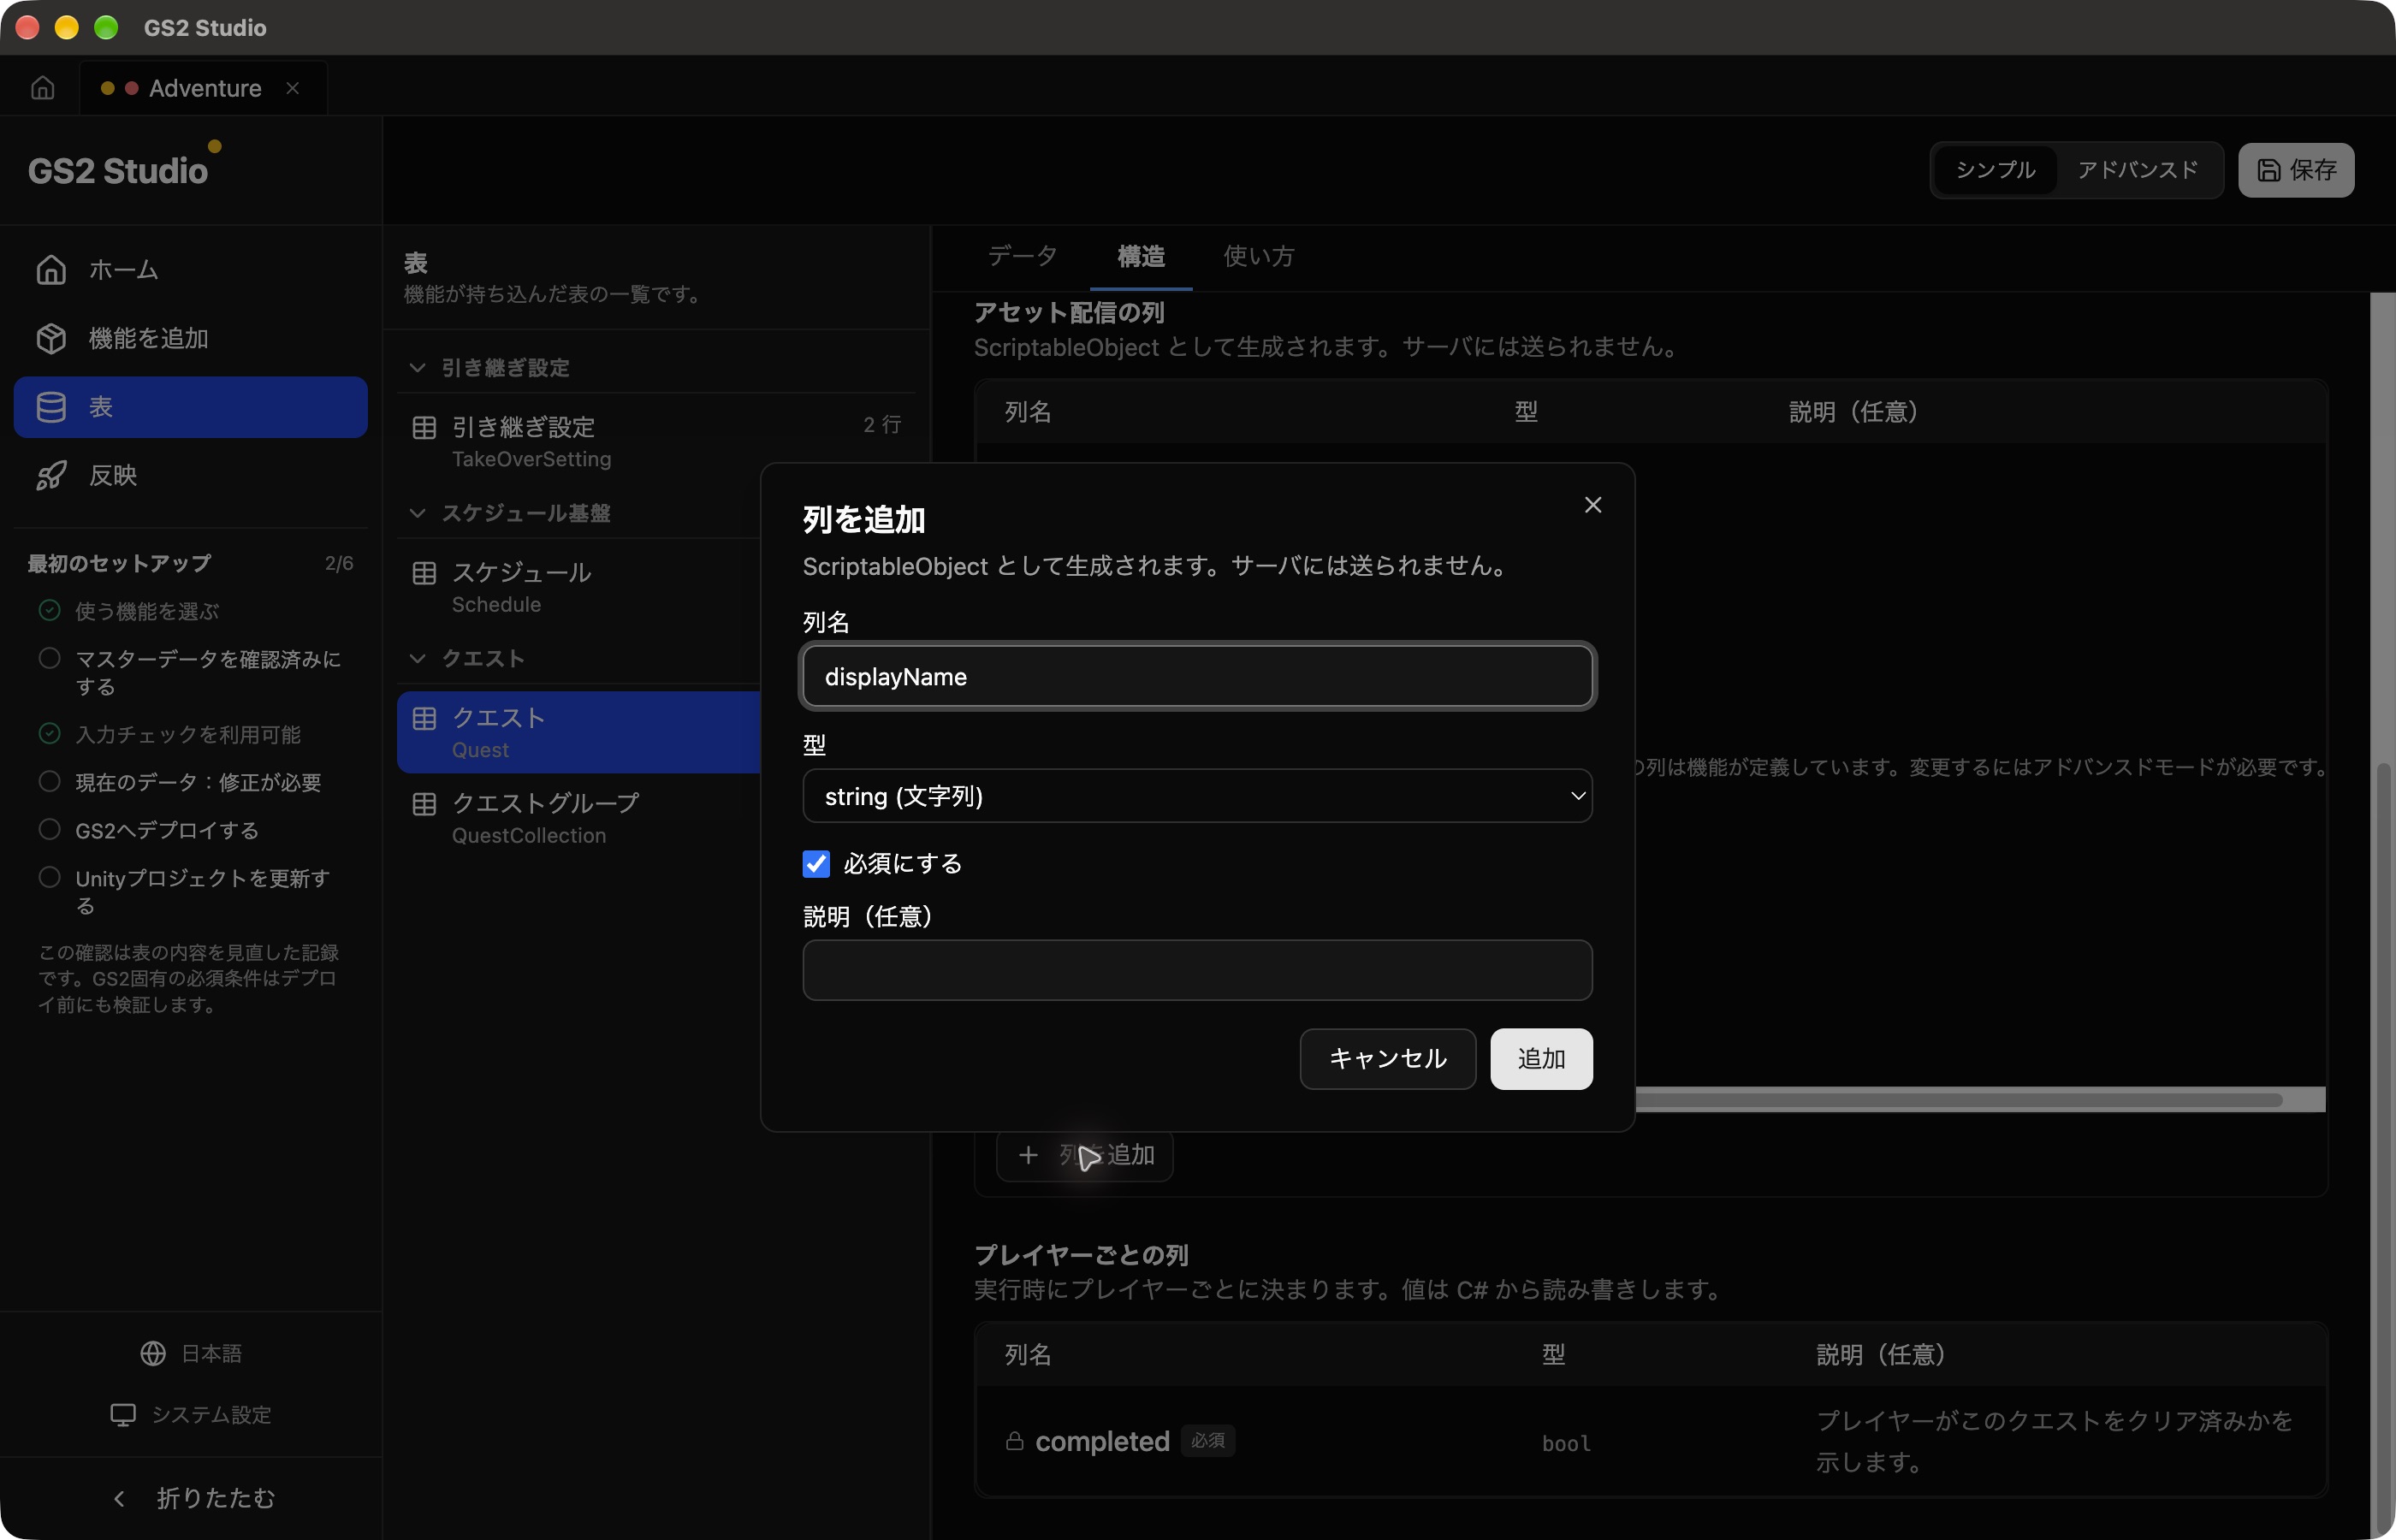
- Open Tables → Quests → Quest (Quest) and select the Structure tab.
- Under Shipped as assets, click Add a column.
- Set the column name to
displayNameand the type to string. Enable Make it required, then click Add.
Register Forest exploration
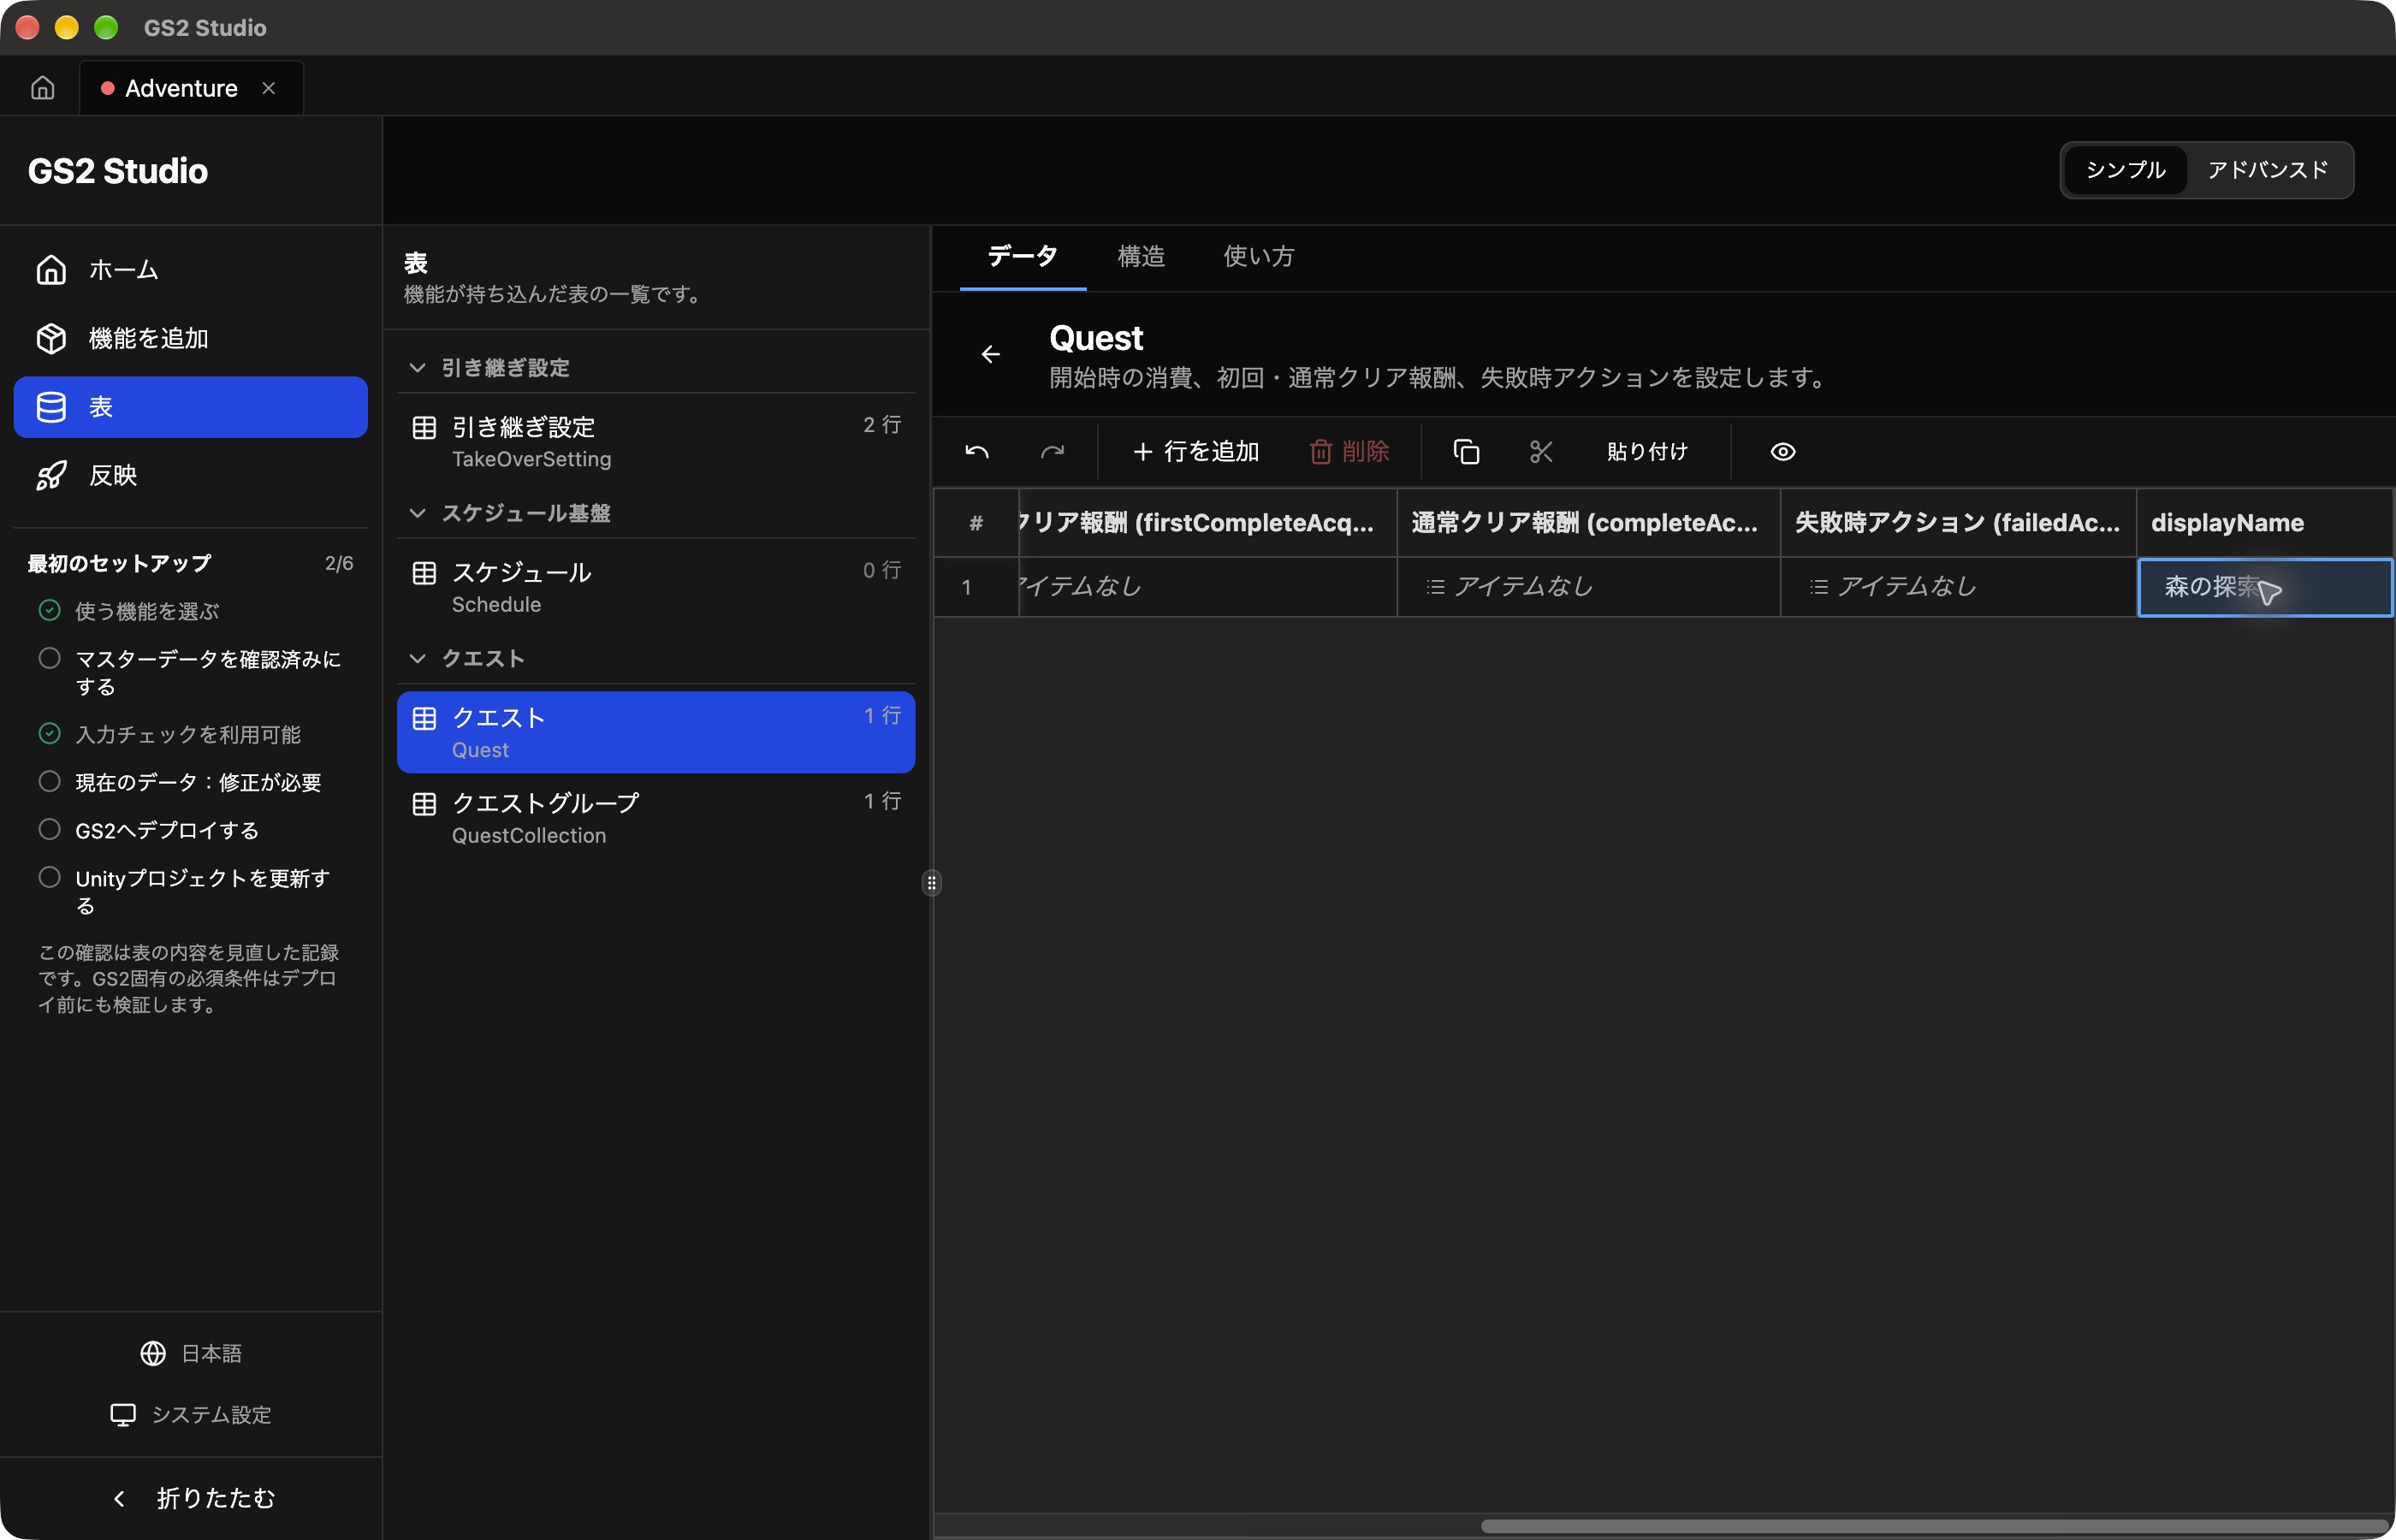
Open the Data tab and use Add row to create the following row. Select a cell and press Enter to edit text or numbers. Open the quest group cell and select main. Leave the action columns at No items.
| ID | Quest group | displayName | Start costs | Completion rewards | First-clear rewards | Failure actions |
|---|---|---|---|---|---|---|
forest | main | Forest exploration | 0 items | 0 items | 0 items | 0 items |
The displayName column is at the far right of the table. Scroll across, enter Forest exploration, and save.
Apply the changes to GS2 and Unity
Click Publish → Calculate server differences and sign in to GS2. Select your learning project and the Tokyo region, review the changes, and deploy. Then run Update the Unity project.
Display the generated quest list
- Add
QuestListHandlerto theGs2object in Unity and set Collection tomain. Leave Item Prefab and Content Parent empty; the code below draws the list. - Create
Assets/AdventureStudioView.csand paste in the following code. - Add
AdventureStudioViewto theGs2object and assignQuestListHandlerto Quests. - Enter Play Mode and log in. Forest exploration appears.
using Gs2.Unity.Util;
using System;
using UnityEngine;
using GS2Studio.Generated.Quest;

public sealed class AdventureStudioView : MonoBehaviour
{
    [SerializeField] private QuestListHandler quests;
    private string message = "";

    private void OnEnable()
    {
        if (quests != null) quests.Failed += ShowLoadError;
    }

    private void OnDisable()
    {
        if (quests != null) quests.Failed -= ShowLoadError;
    }

    private void ShowLoadError(Exception error)
    {
        message = "Could not load: " + error.GetType().Name;
    }

    private void OnGUI()
    {
        if (quests == null || Gs2GameSessionHolder.Instance == null || !Gs2GameSessionHolder.Instance.Initialized) return;
        GUILayout.BeginArea(new Rect(20, 100, 650, 650), GUI.skin.box);
        GUILayout.Label(message);
        if (!quests.IsLoaded) { GUILayout.Label("Loading adventures..."); GUI.enabled = true; GUILayout.EndArea(); return; }
        foreach (var quest in quests.Binders)
        {
            GUILayout.Label(quest.DisplayName);
        }
        GUI.enabled = true;
        GUILayout.EndArea();
    }

}Deploy the settings
Download this chapter’s template. In the console, choose Deploy → Create stack and name the stack adventure-game. Select the downloaded file under Template data. Keep the existing adventure-login stack.
The quest settings are shown below. Store the display name as a string in metadata; Unity reads it as a string too.
Settings:
  version: 2019-05-14
  groups:
    - name: main
      quests:
        - name: forest
          metadata: Forest exploration
          contents:
            - weight: 1
              completeAcquireActions: []
          consumeActions: []
          firstCompleteAcquireActions: []
          failedAcquireActions: []
Add the quest list script
Create Assets/AdventurePlay.cs, paste in the code below, and add it to the Adventure object. In the Inspector, assign chapter 1’s AdventureLogin to Login. Enter Play Mode and log in to see the quest list.
using Cysharp.Threading.Tasks;
using System.Collections.Generic;
using Gs2.Unity.Gs2Quest.Model;
using UnityEngine;

public sealed class AdventurePlay : MonoBehaviour
{
    [SerializeField] private AdventureLogin login;
    private readonly List<EzQuestModel> quests = new List<EzQuestModel>();
    private bool ready;
    private string message = "Loading...";

    private void OnGUI()
    {
        if (login == null || login.Session == null) return;
        GUILayout.BeginArea(new Rect(20, 210, 650, 650), GUI.skin.box);
        GUILayout.Label(message);
        if (ready)
        {
            foreach (var quest in quests)
            {
                GUILayout.Label(quest.Metadata + " (" + quest.Name + ")");
            }
        }
        GUI.enabled = true;
        GUILayout.EndArea();
    }

    private void Start() => LoadQuests().Forget();

    private async UniTask LoadQuests()
    {
        try
        {
            await UniTask.WaitUntil(() => login.Session != null,
                cancellationToken: this.GetCancellationTokenOnDestroy());
            var group = login.Gs2.Quest.Namespace("adventure-quest").QuestGroupModel("main");
            await foreach (var item in group.QuestModelsAsync())
            {
                if (item != null) quests.Add(item);
            }
            ready = true;
            message = quests.Count == 0 ? "No adventures available" : "Loaded";
        }
        catch (System.OperationCanceledException) { }
        catch (System.Exception error)
        {
            message = "Could not load: " + error.GetType().Name;
        }
    }
}Try opening the list
Start the game and log in. Check that the list contains one quest, Forest exploration.
Practice: change the settings
Try changing the name to Forest patrol. In Studio, deploy the settings and update the Unity assets. With the SDK, apply the settings and load the quests again. Has the name on screen changed? After deployment, it can take up to five minutes for the changed settings to take effect in the game. If the old name is still displayed, wait a little, then stop and restart Play Mode in Unity to check again.
Before moving on
If you changed the display name in the exercise, change it back to Forest exploration and apply the change. Keep the group as main and the identifier as forest, with no costs or rewards configured yet.